VMware Cloud Director 10.2 is generally available now with a lot of enhancements and features such as full use of NSX-T and delivering self-service functionality in Edge firewall and IP services, distributed L4/L7 firewall, Avi load balancer through the tenant portal, VDC groups, VRF-lite support, Tanzu, storage IOPS and many more available here.
I decided to upgrade my vCD environment from 10.1 to 10.2 version and show you hereunder a step-by-step procedure to do that upgrade so you can benefit from.
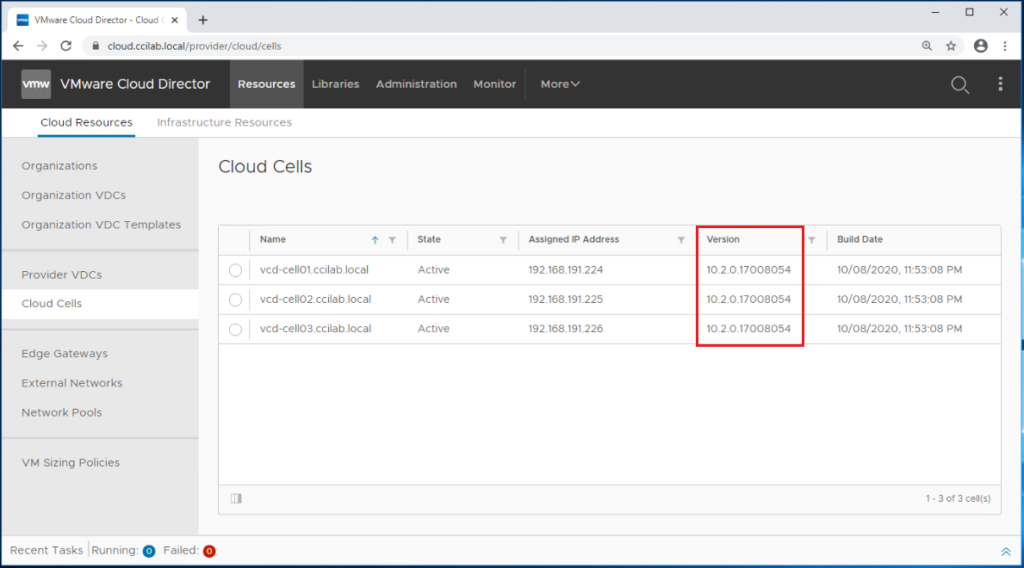
Current Cloud Director Environment
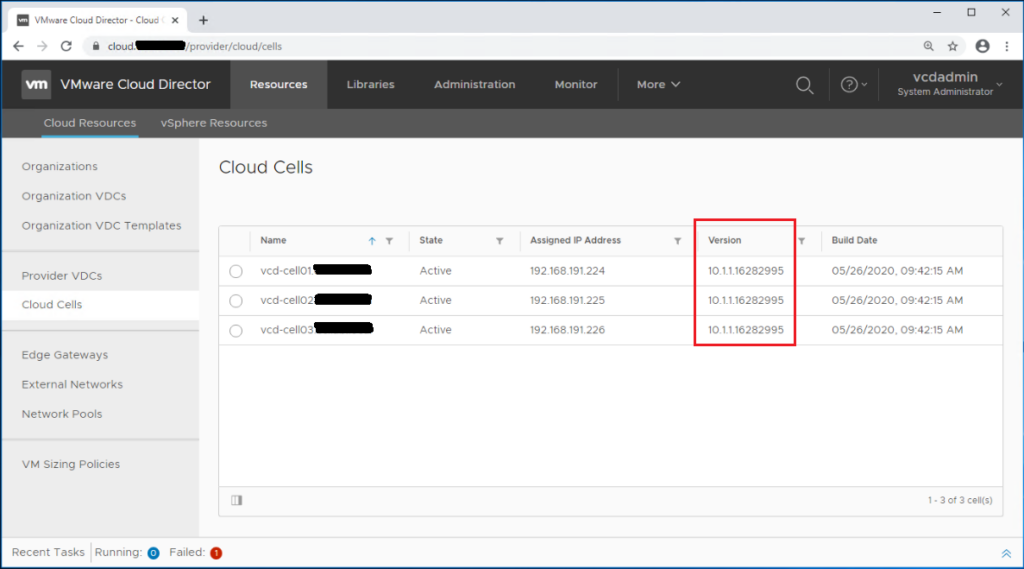
Currently I am running a 3-cell primary-standby-standby vCD 10.1.x environment with an embedded PostgreSQL database.
To identify the current version of your Cloud Director solution, simply login to your provider portal https://<vCD IP Address or FQDN>/Provider and navigate to Resources > Cloud Resources > Cloud Cells.
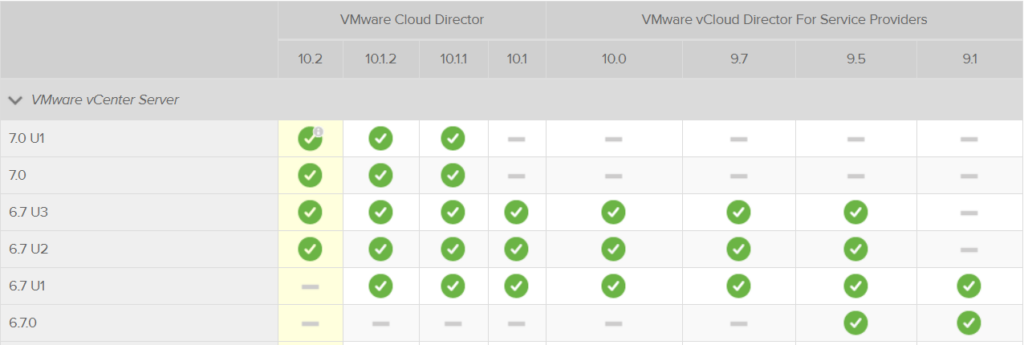
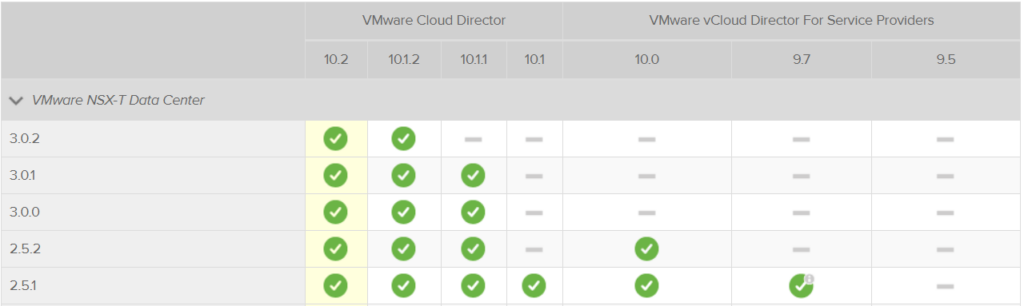
Check VMware Interoperability Matrices
Before thinking about the upgrade, I encourage you to visit VMware Interoperability matrices to check if vCD 10.2 is compatible with your underlying infrastructure such as vSphere, NSX-T , …
High-Level Upgrade Steps
You will have to follow the below ordered steps to upgrade your multi-cell vCD 10.x environment to the latest 10.2 version:
- Upgrade the primary vCD cell
- Upgrade all standby and application cells
- Upgrade the embedded database
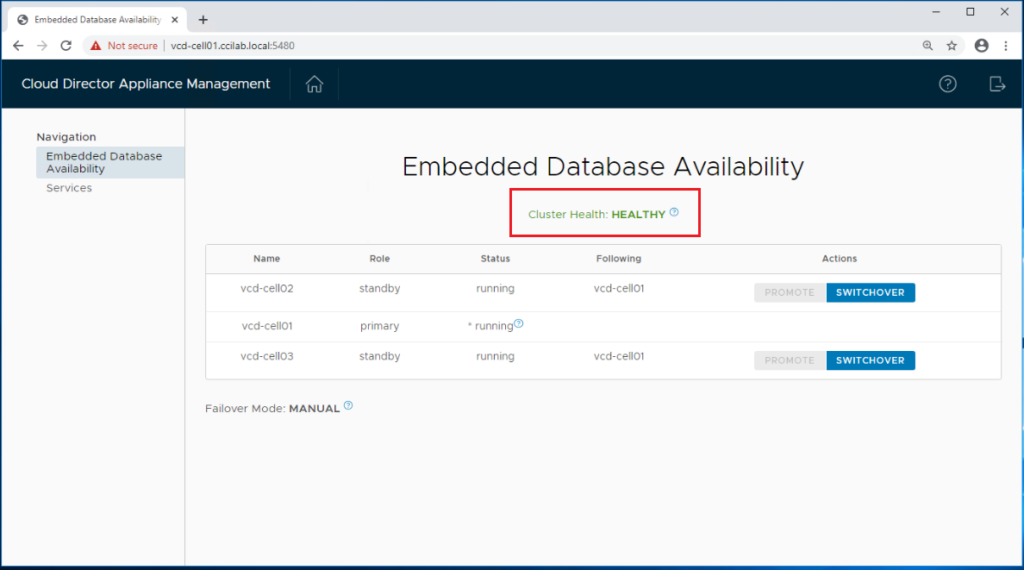
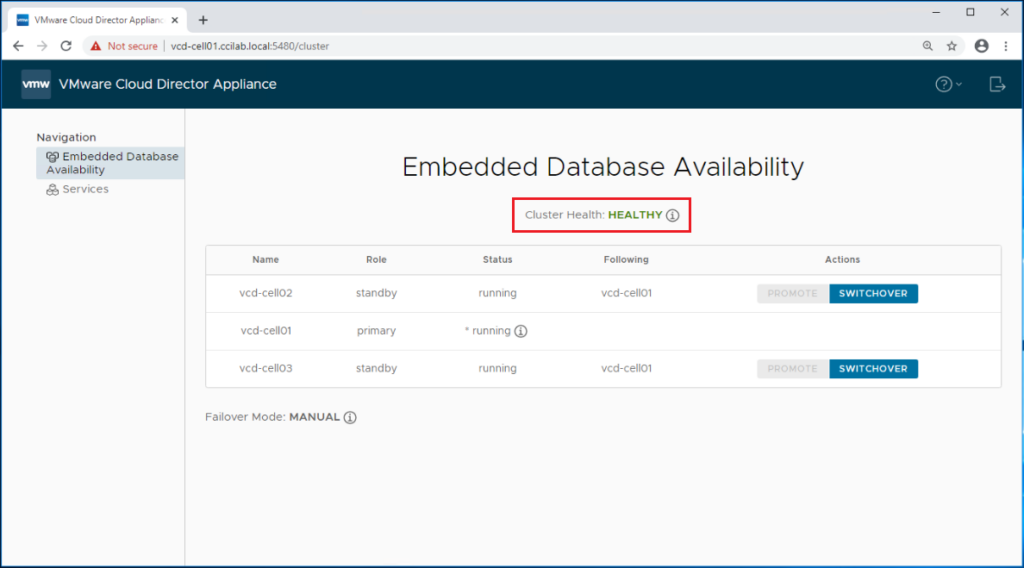
First of all, we need to identify the primary appliance as we have to upgrade the primary appliance before the standby and application cells. Login to the cloud director management interface https://<vCD Cell IP Address or FQDN>:5480 using root credentials.
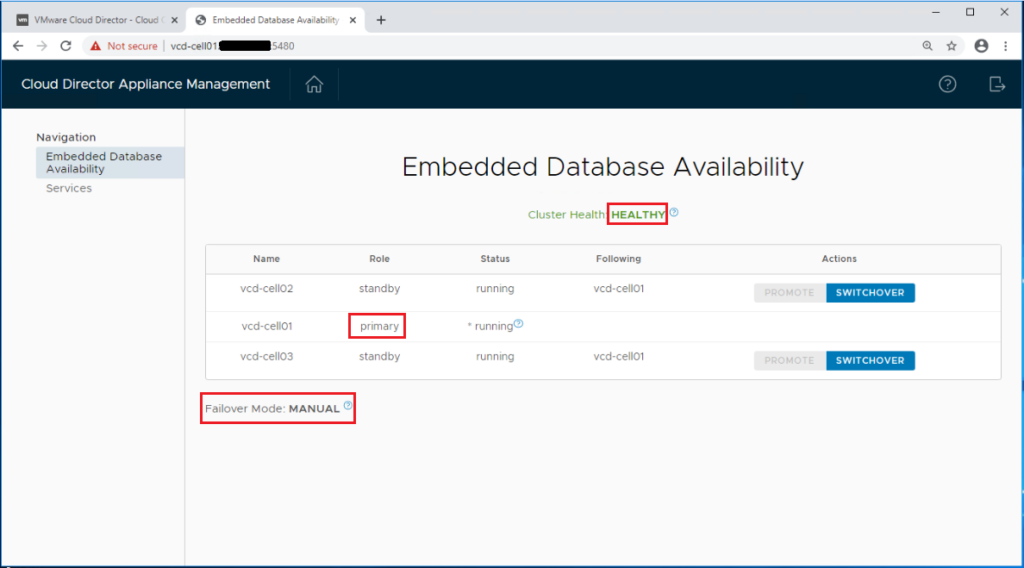
Make sure the environment is healthy and make a note of the primary vCD appliance.
NOTE: When upgrading from version 10.1 or later or when patching, if the automatic failover in case of a primary database service failure is enabled, change the failover mode to Manual during the upgrade. After the upgrade, you can set the failover mode to Automatic.
1. Upgrade the primary vCD cell
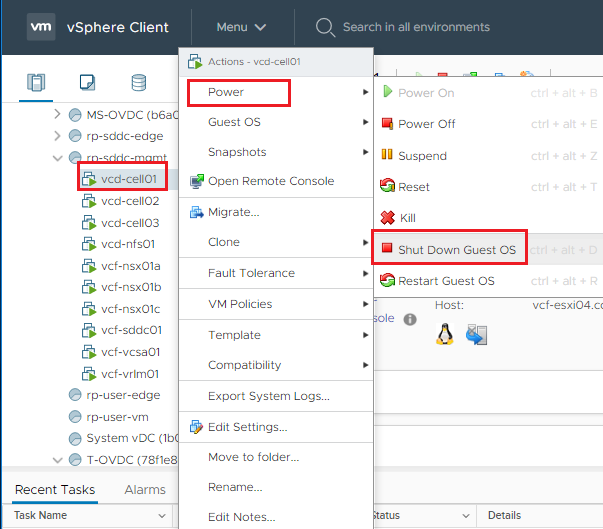
Start by taking a snapshot of the primary vCD appliance. Navigate to the primary VMware Cloud Director appliance in the vCenter inventory, right-click it, and click Power > Shut Down Guest OS.
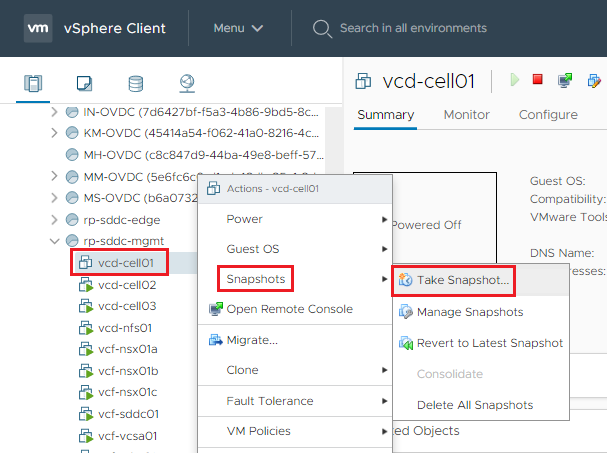
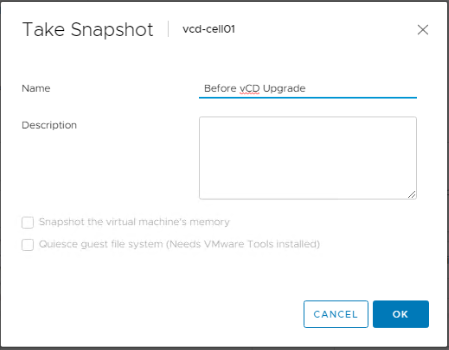
Right-click the appliance and click Snapshots > Take Snapshot. Enter a name and, optionally, a description for the snapshot, and click OK.
Right-click the VMware Cloud Director appliance and click Power > Power On.
Wait for the appliance to boot completely, and verify that all nodes in your database high availability configuration are in a good state.
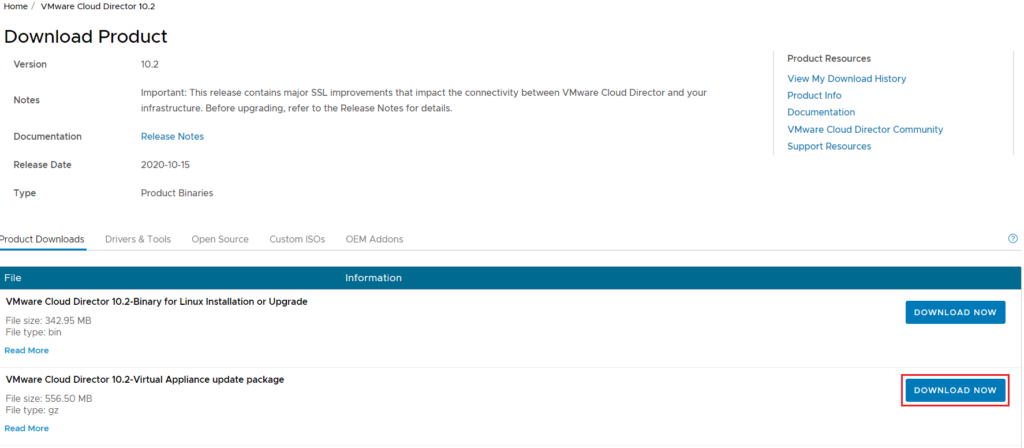
Download the vCD 10.2 update package from here. The file name is:
VMware_Cloud_Director_10.2.0.5190-17029810_update.tar.gz
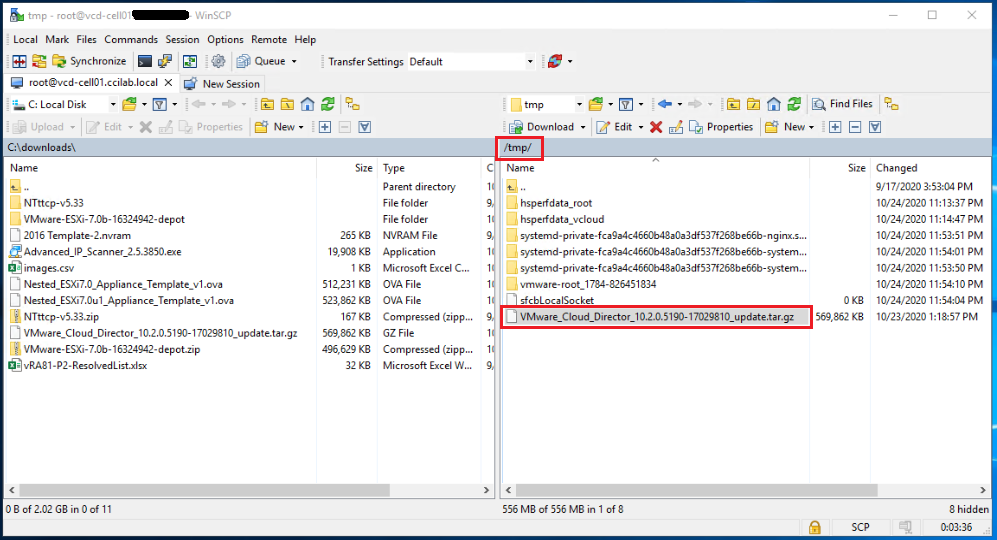
Use WinScp to upload the update package to a temporary location on the primary appliance. I will use /tmp.
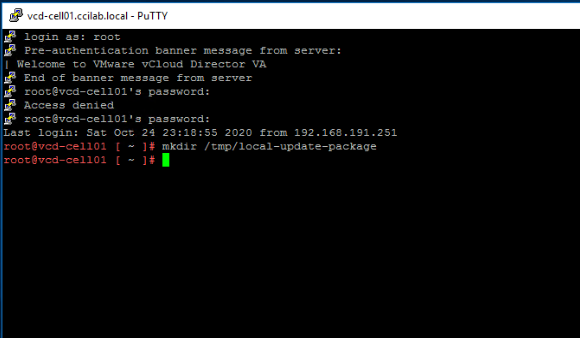
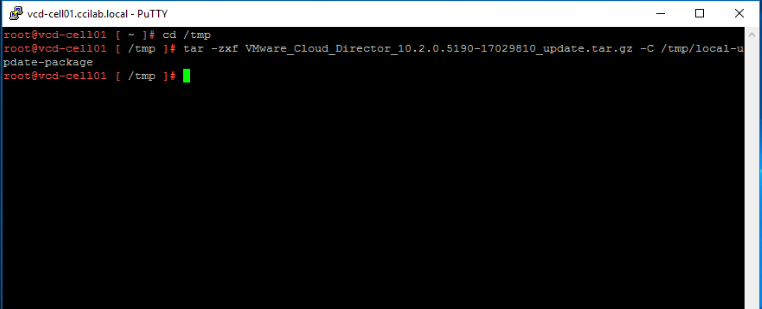
SSH to the primary appliance and create a local-update-package directory in which to extract the update package: mkdir /tmp/local-update-package
Extract the update package in the newly created directory:
tar -zxf VMware_Cloud_Director_10.2.0.5190-17029810_update.tar.gz -C /tmp/local-update-package
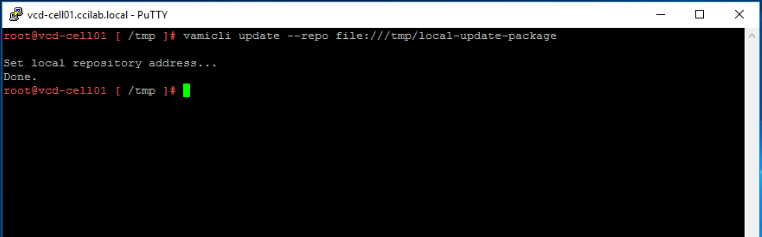
Set the local-update-package directory as the update repository.
vamicli update –repo file:///tmp/local-update-package
Check for updates to verify that you established correctly the repository
vamicli update –check
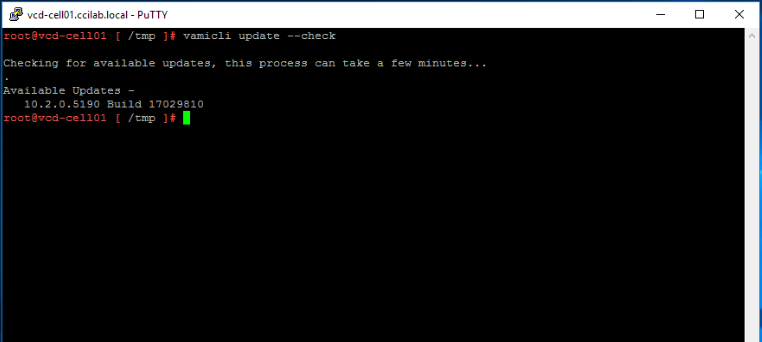
The upgrade release appears as an Available Update.
Shut down VMware Cloud Director by running the following command:
cd /opt/vmware/vcloud-director/bin/
./cell-management-tool -u <admin username> cell –shutdown
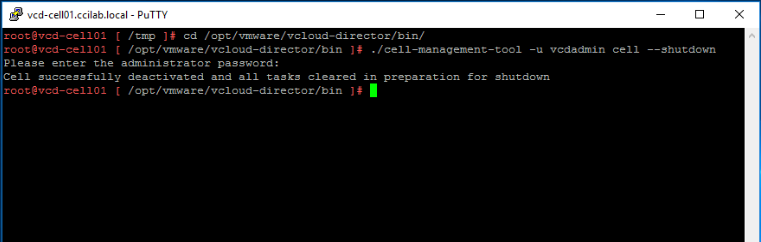
Notice that the Cell Management Tool (CMT) will prompt for the system admin account credentials.
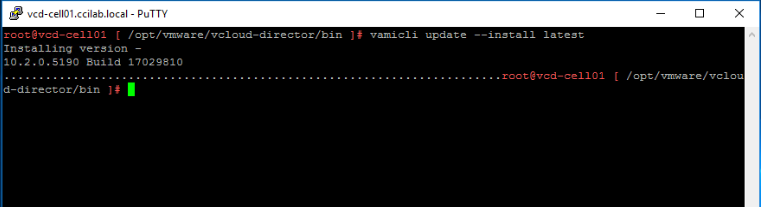
Apply the available upgrade using a single command:
vamicli update –install latest
2. Upgrade all standby and application cells
Repeat the tasks in Step1 to upgrade the remaining standby and application cells.
3. Upgrade the embedded database
From the primary appliance, back up the VMware Cloud Director appliance embedded database. /opt/vmware/appliance/bin/create-db-backup

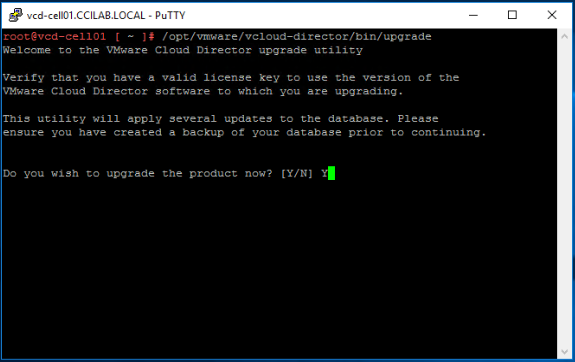
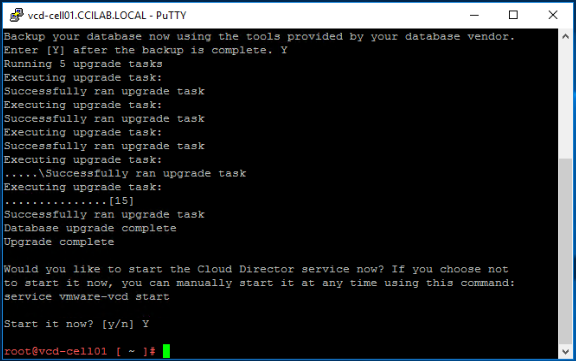
From any appliance, run the VMware Cloud Director database upgrade utility.
/opt/vmware/vcloud-director/bin/upgrade
Reboot each VMware Cloud Director appliance: shutdown -r now
We are done!
Post-Upgrade Validation
Check the cluster status and make sure all is healthy and in good shape.
You can now validate the new version of your vCD cells.
If the upgrade is successful, you can delete the snapshot of the VMware Cloud Director appliance.
If the upgrade is not successful, you can roll back the VMware Cloud Director appliance to the snapshot that you took before the upgrade.
Hope this post was informative,
Thanks for reading,
 (3 votes, average: 5.00 out of 5)
When changing the existing global.properties file on the target server, the installer displays a warning Optional Update logging properties After an upgrade, new logging properties are written to the file When the vCloud Director upgrade finishes, the installer displays a message with information about the location of the old configuration files. Then the installer prompts you to run the database upgrade tool. From an upgraded vCloud Director server, you run a tool that upgrades the vCloud Director database.
The removal of is due in a future VMware Cloud Director release. You must use the for both HTTP and HTTPS protocols. The reset actions and are removed from VMware Cloud Director API Version 35.0 due to the way VMware Cloud Director stores and handles SSL certificates.
doing the rollback of the snapshot on the primary cell what happen on the others standby cell that is yet upgraded?
what is the correct rollback procedure?