Recently, I was engaged in a NSX deployment where we installed NSX for vSphere v6.3.4. However, couple of days later, VMware highlighted that there is a critical bug with this release in the photon based NSX controllers in which a default 90 days password expiration (from release date) has been set for the default user accounts (admin/root). The new Controller deployment will succeed until January 1st, 2018 and any new Controller deployment will fail after that date.
The issue is documented in the below VMware KB article:
https://kb.vmware.com/s/article/000051144
This issue can be fixed temporarily by running two scripts through API call on the NSX manager. This is fine for existing NSX controllers but the issue will appear again if you attempt to re-deploy any new controllers after 90 days from NSX 6.3.4 release date. In addition, you can permanently solve it by upgrading to NSX version 6.3.5.
As the environment was still not in production yet, i preferred to upgrade the whole NSX environment and solve this issue for once.
In this blog, I will show you a step-by-step procedure on how to upgrade a single-site NSX environment from NSX 6.3.4 to version 6.3.5. NSX components should be upgraded in the specified order.
An NSX deployment upgrade proceeds as follows:
NSX Manager —> NSX Controller Cluster —> NSX Host Clusters —> Distributed Logical Routers & Edges —> Guest Introspection.
- It is highly recommended to have a backup of NSX Manager, vCenter, and distributed switches prior to upgrading the environment. Proper backup of all NSX components is crucial to restore the system to its working state in the event of a failure.
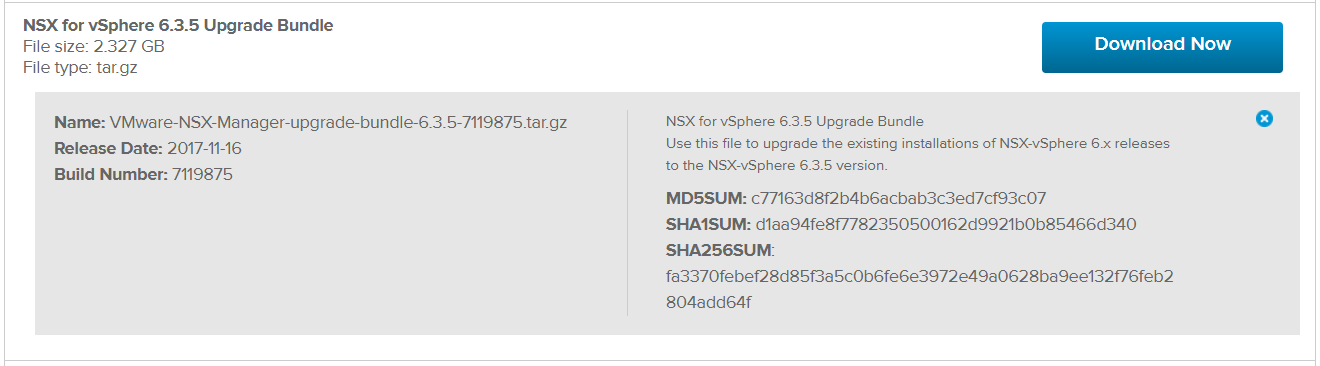
- Download the NSX upgrade bundle from VMware downloads site:
- NSX Manager Upgrade: Login to the NSX Manager virtual appliance and upload the downloaded tar.gz file.
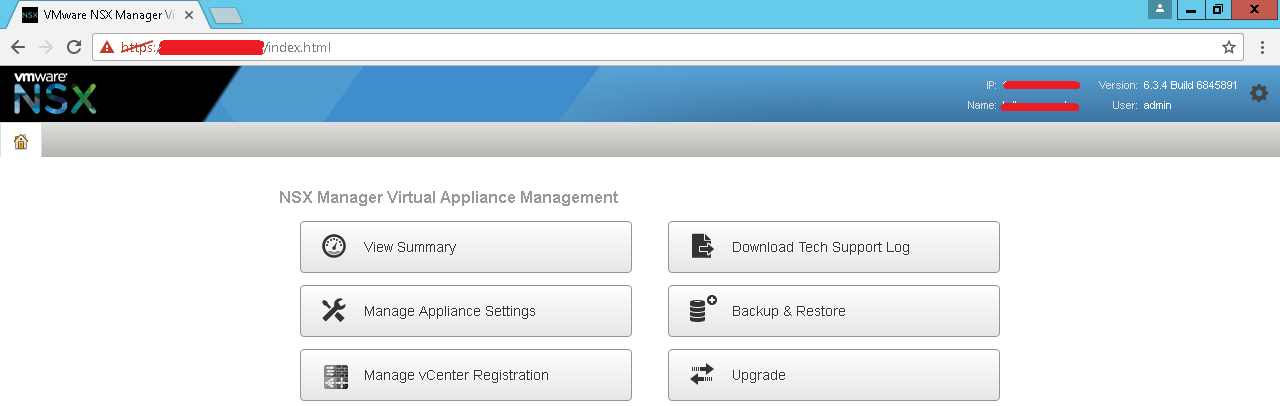 From the home page, click on “Upgrade”.
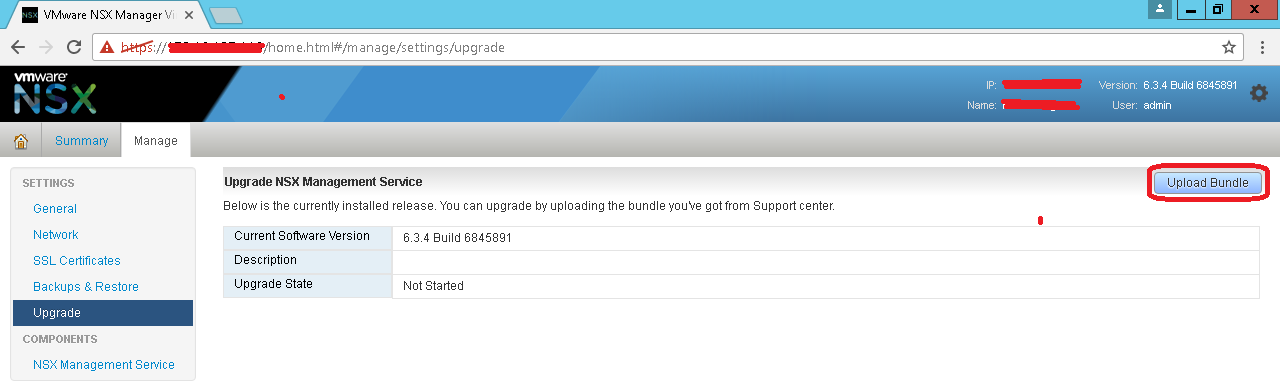 Click on “Upload bundle” then “Choose file” and browse for the downloaded tar.gz file.
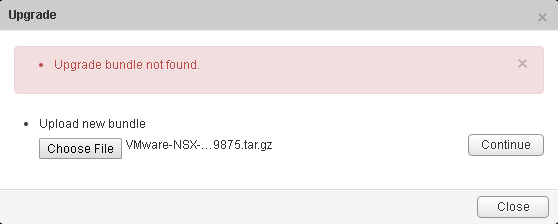 Click on “Continue” to start the upload.
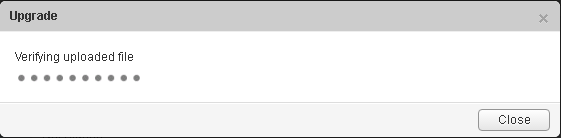
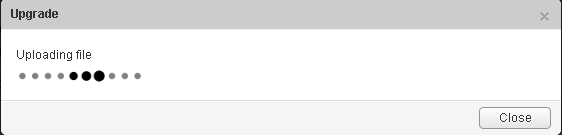
 In the Upgrade dialog box, specify whether you want to enable SSH, and whether you want to participate in VMware’s Customer Experience Improvement Program (“CEIP”). Click “Upgrade” to start the upgrade.
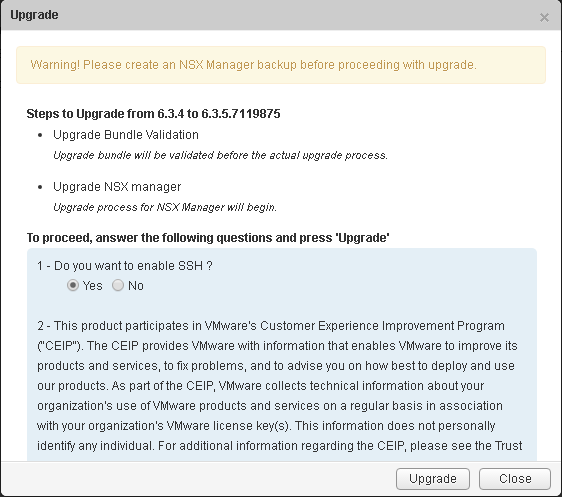 The upgrade status displays in the browser window. Wait until the upgrade procedure completes and the NSX Manager login page appears.
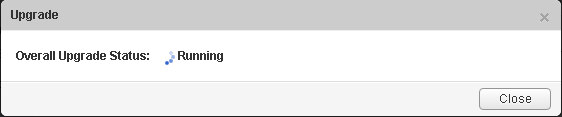 Log in to the NSX Manager virtual appliance again, and from the home page click “Upgrade”. Confirm that the upgrade state is Complete, and the version and build number on the top right matches the upgrade bundle you just installed.
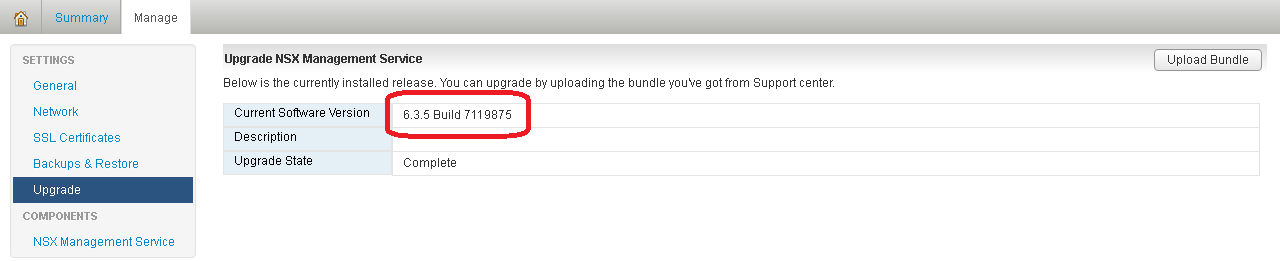 After upgrading NSX Manager, you must log out and log back in to the vSphere Web Client.
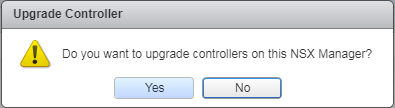
 - NSX Controllers Cluster Upgrade: The controllers in your environment are upgraded at the cluster level. If an upgrade is available for a controller node, an upgrade link appears in the NSX Manager.
It is recommended that you upgrade the controllers during a maintenance window. Navigate to Home > Networking & Security > Installation, select the Management tab, and click “Upgrade Available” in the Controller Cluster Status column.
The controllers in your environment are upgraded and rebooted one at a time. After you initiate the upgrade, the system downloads the upgrade file, upgrades each controller, reboots each controller, and updates the upgrade status of each controller.
 When the upgrade is complete, the Software Version column in the NSX Controller nodes section displays the new build number for each controller.
 - Host Clusters Upgrade: After upgrading NSX Manager and NSX Controllers, you can update the appropriate clusters in your environment. Upgrading the host clusters upgrades the NSX VIBs. In the vSphere Web Client, navigate to Home > Networking & Security > Installation, select the “Host Preparation” tab.
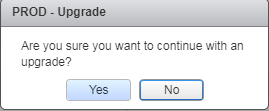
For each cluster that you want to upgrade, click “Upgrade available”. Choose “Yes” to confirm the upgrade when prompted.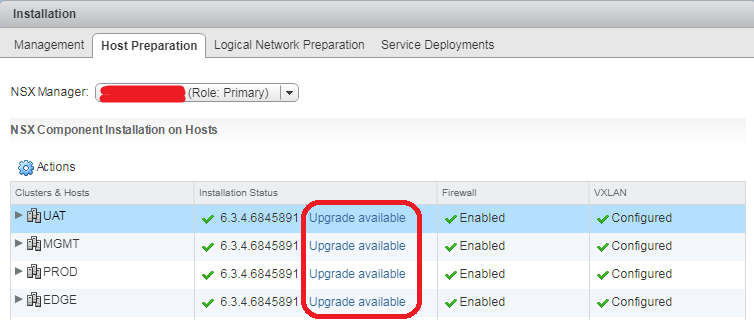
 The cluster Installation Status displays Not Ready. Click “Not Ready” to display more information. Click “Resolve all” to attempt to complete the VIB installation.
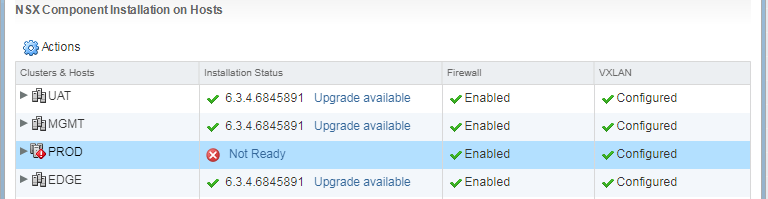
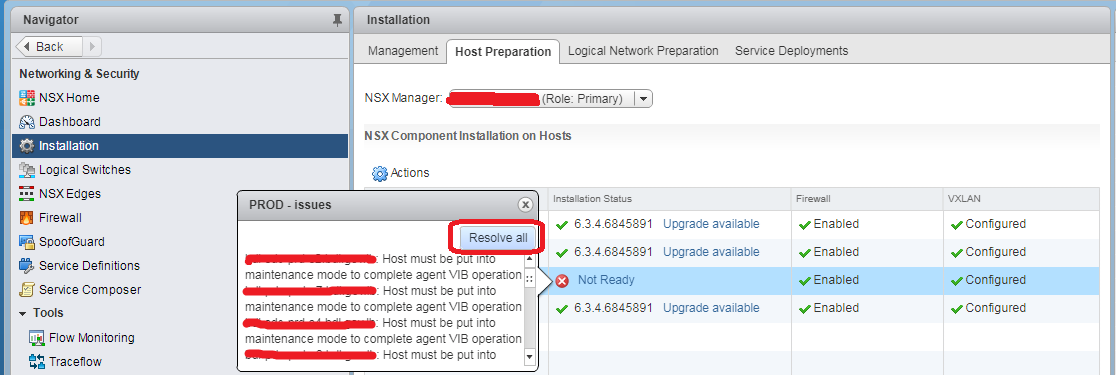
The hosts are put in maintenance mode, and rebooted if required, to complete the upgrade. The Installation Status column displays Installing. Once the upgrade is complete the Installation Status column displays a green check mark and the upgraded NSX version. Note: If the cluster has DRS enabled, when you click “Resolve all” DRS attempts to put the hosts into maintenance mode in a controlled fashion that allows the VMs to continue running. VMs are moved to other hosts in the cluster and the hosts enter maintenance mode.
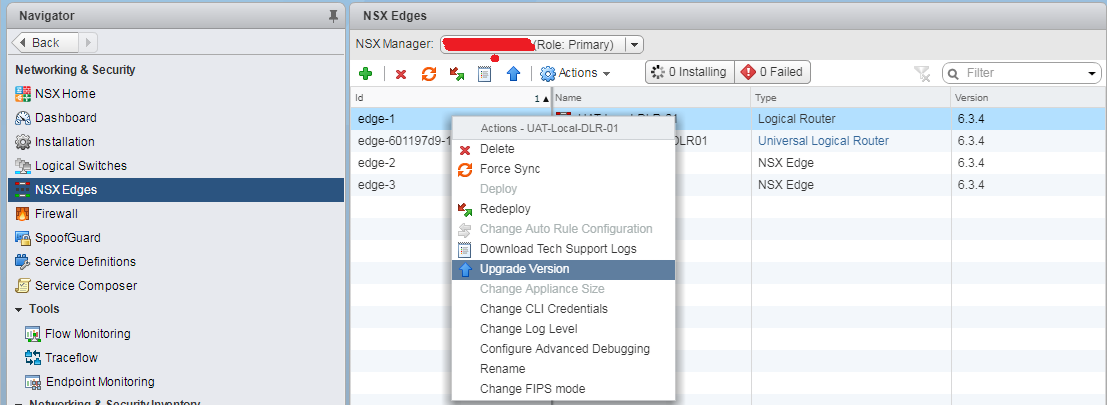
If the cluster does not have DRS enabled, you must power off or vMotion the VMs manually before beginning the upgrade. You must manually put the hosts into maintenance mode to complete the upgrade. - NSX Edge/DLR Upgrade: During the upgrade process, a new Edge virtual appliance is deployed alongside the existing one. This means that an edge upgrade is disruptive and should be scheduled in a planned maintenance window. In the vSphere Web Client, select Networking & Security > NSX Edges. For each NSX Edge instance, select “Upgrade Version” from the “Actions”menu.
 Click “Yes” to confirm the upgrade as there will be a temporary service disruption.
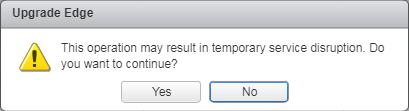 You can see the new version of the upgraded edge shown as 6.3.5.
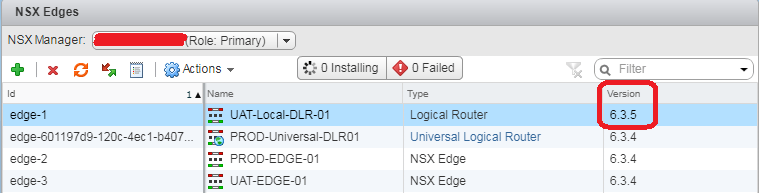
- Guest Introspection Upgrade: If you are using guest introspection, you have to upgrade Guest Introspection to match the NSX Manager version.
In the Installation tab, click Service Deployments. The Installation Status column says Upgrade Available. Select the Guest Introspection deployment that you want to upgrade and click the “Upgrade” arrow icon.
After Guest Introspection is upgraded for a particular cluster, you can upgrade any partner solutions. If partner solutions are enabled, refer to the upgrade documentation provided by the partner. Even if the partner solution is not upgraded, protection is maintained.
If you want to estimate the time needed for the NSX upgrade, NSX component upgrade times are as follows:
- NSX Manager – 30 minutes
- NSX Controller – 5-10 minutes (each)
- NSX Edge Service Gateway – 15 minutes (each)
- NSX vSphere Host – 15 minutes (each)
Although NSX host upgrades after 6.3 are reboot-less, but evacuation still applies. So you have to add time for DRS evacuations and reboot to each host time if applicable.
Hope this post is informative.
Mohamad Alhussein

 (4 votes, average: 4.00 out of 5)