
Introduction
In order to centralize certificate management and unify the procedure of generation of certificates for VMware management components in the whole SDDC stack, the VMware Validated Design Certificate Generation Utility (CertGenVVD) can be used to generate certificate signing request (CSR) files and automatically sign them using your Microsoft CA authority. This will save you a lot of time and efforts and make sure the generated certificates are compliant with VVD requirements.
In the below post, I will guide you, step-by-step, how to install CertGenVVD tool and use it to generate required certificates for vRealize Automation. The same procedure can be followed by other VMware SDDC products.
CertGenVVD Prerequisites
You run the CertGenVVD utility on a Windows operating systems that has the Java SE Development Kit and OpenSSL installed.
- Operating System: Win 2K12 R2
- Java SE Development Kit (JDK): 1.7 or later
- OpenSSL: 1.0.2d or later
Install CertGenVVD Tool
- Download CertGenVVD zip file and extract the ZIP file to the C: drive.
https://kb.vmware.com/s/article/2146215 - Download and install OpenSSL-Win64. Note that Microsoft Visual C++ 2008 redistributable package x64 should be installed as a prerequisite for OpenSSL. It can be installed from here.
http://slproweb.com/products/Win32OpenSSL.html - Download and install JDK8:
http://www.oracle.com/technetwork/java/javase/downloads/jdk8-downloads-2133151.html - Create environment variables for openssl:
$env:path = $env:path + “;C:\OpenSSL-Win64\bin” - Create environment variables for Keytool:
$env:path = $env:path + “;C:\Program Files\Java\jre1.8.0_192\bin”
NOTE: The default installation paths are used in the above two powershell commands. Change the JRE version in command according to the version you download.
Create Certificate Template
- Login to your CA server. Click Windows Start > Run, enter certtmpl.msc, and click OK.
- In the Certifcate Template Console, under Template Display Name, right-click Web Server and click Duplicate Template.
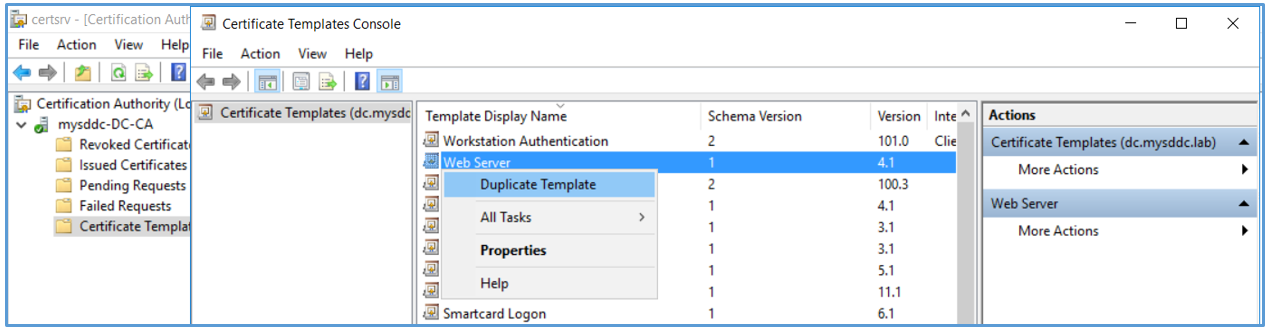
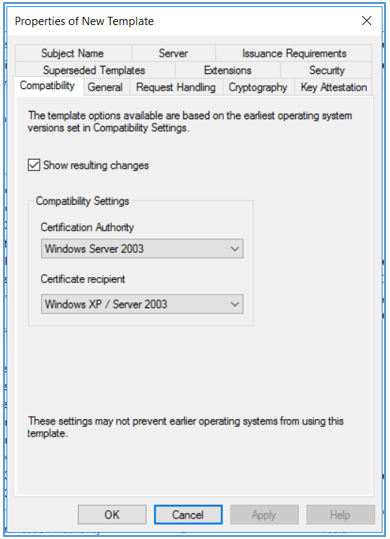
- In the Duplicate Template window, leave Windows Server 2003 Enterprise selected for backward compatibility and click OK. If you are using SHA2 encryption level, select Windows Server 2008 Enterprise.
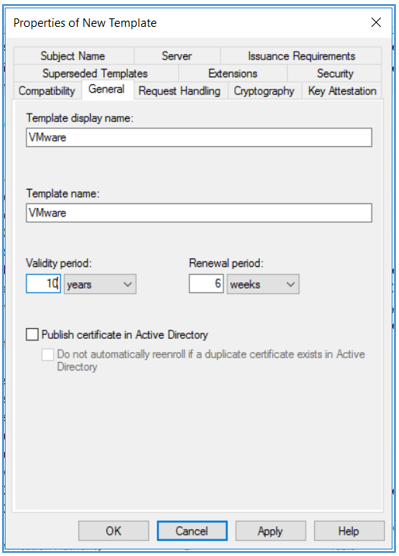
- In the Properties of New Template dialog box, click the General tab. In the Template display name text box, enter VMware as the name of the new template. Change the validity period according to your needs.
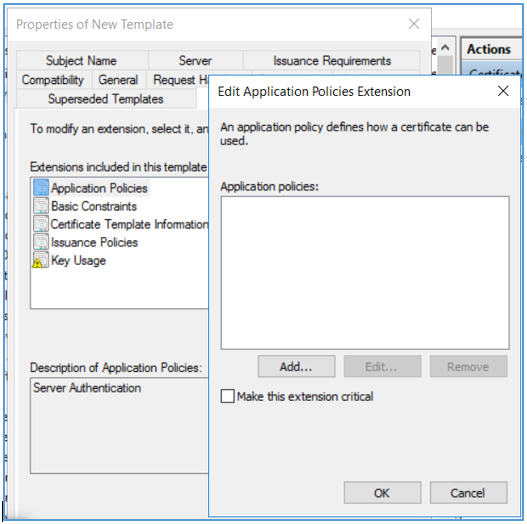
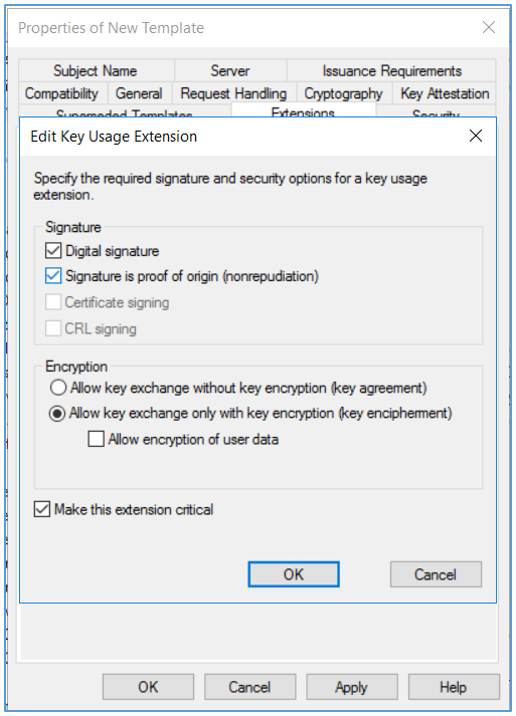
- Click the Extensions tab. Edit Application Policies and remove Server Authentication from it. Edit Key usage and select the Signature is proof of origin (nonrepudiation) check box. Leave the default for all other options. Click OK.
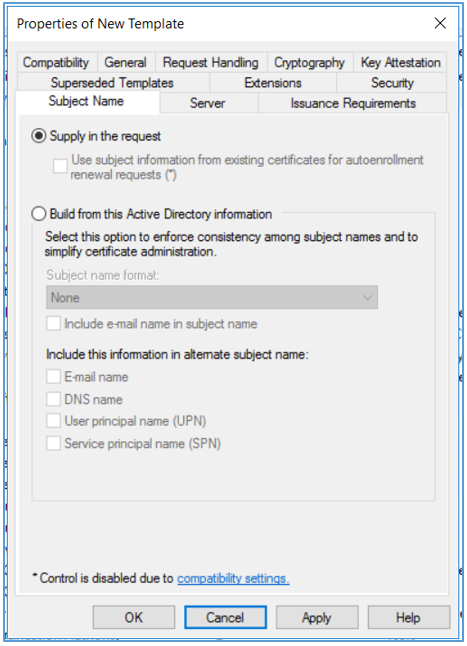
- Click the Subject Name tab, ensure that the Supply in the request option is selected, and click OK to save the template.
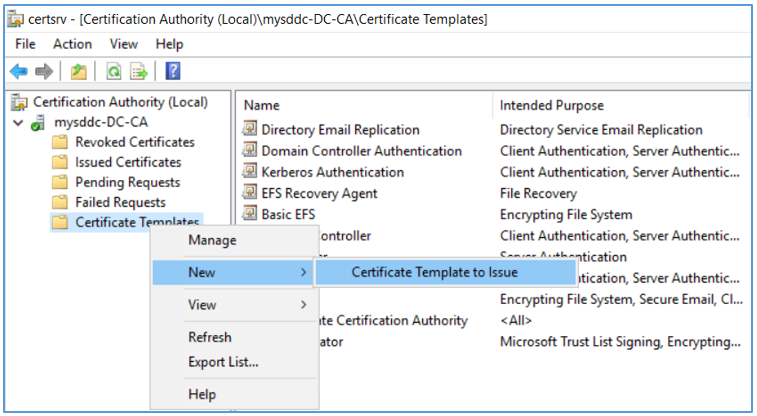
- To add the new template to your CA, click Windows Start > Run, enter certsrv.msc, and click OK. Right-click Certificate Templates and select New > Certificate Template to Issue.
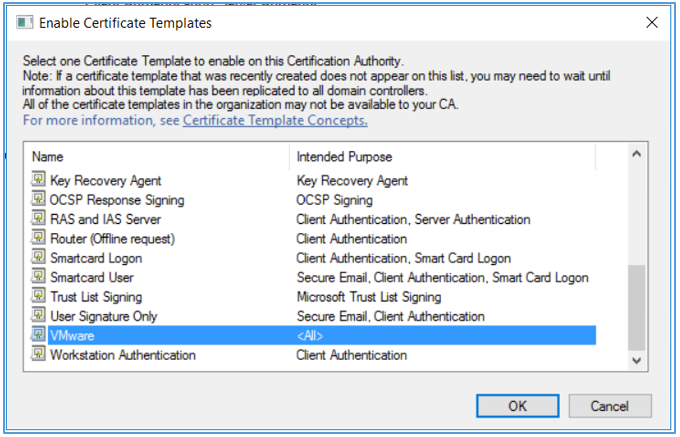
- In the Enable Certifcate Templates dialog box, select the VMware certifcate that you just created in the Name column and click OK.
Create Config files
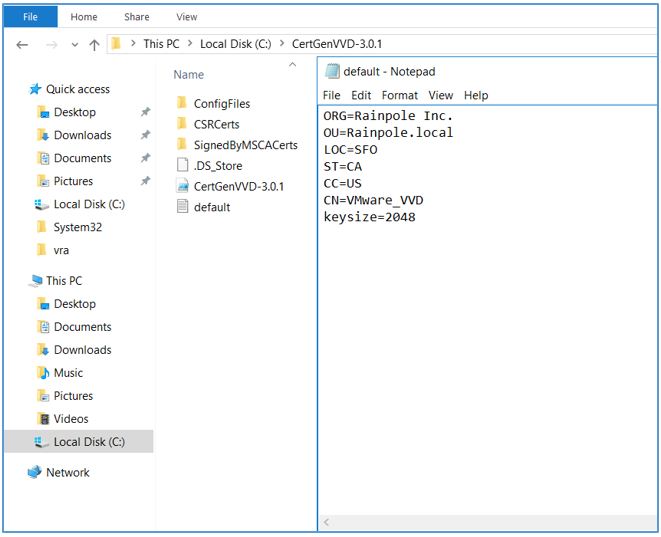
- Navigate to the CertGenVVD-3.0.1 file location and open default.txt with your favorite text editor. Update the default values according to your organization needs and save.
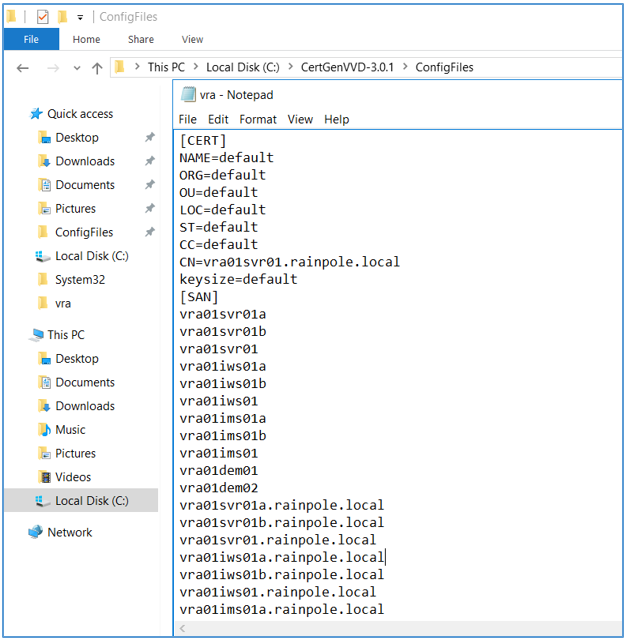
- Open vra.txt in ConfigFiles folder. Edit vra.text to match your environment.You can delete all other txt files if you need only to generate certificate for VRA. The tool will create a certificate for any config file in this folder.Short names and FQDN names for VRA appliances, IaaS Web servers, IaaS manager Servers and their corresponding load balancers will need to be added to the list of subject alternative names (SAN).Note that the parameter values in default.txt will replace the [CERT] values that are set to default in the vra.txt file.
Generate MSCA Signed Certificate
- Open a Windows PowerShell prompt and navigate to the CertGenVVD folder.
cd C:\CertGenVVD-3.0.1 - Grant permissions to run third-party PowerShell scripts.
Set-ExecutionPolicy Unrestricted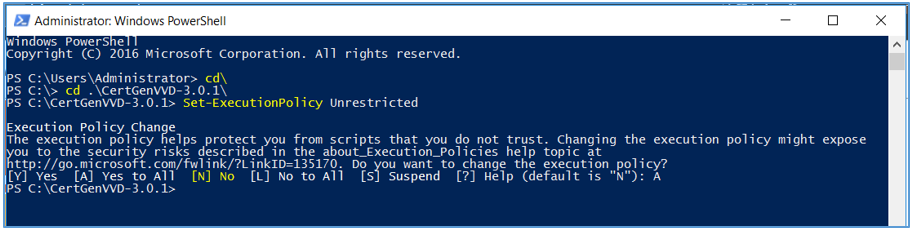
- Validate if you can run the utility using the configuration on the host and verify if VMware is included in the printed CA template policy.
.\CertgenVVD-version.ps1 –validate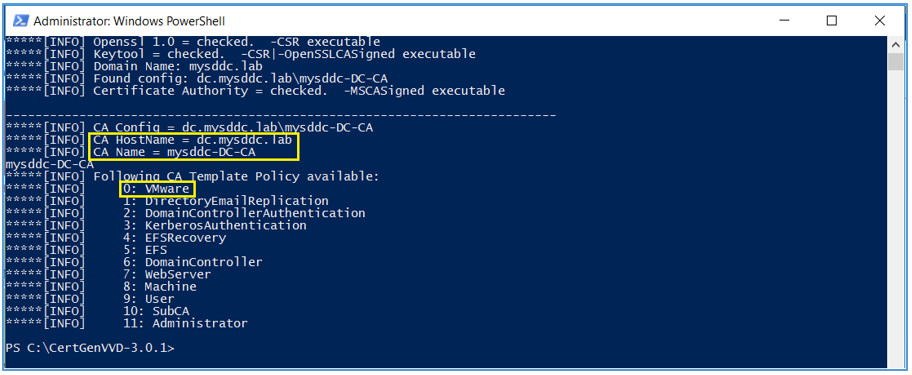
-
Generate certificates signed by your MS CA authority by the below powershell command:
.\CertGenVVD-3.0.1.ps1 -MSCASigned -attrib ‘CertificateTemplate:VMware’
where VMware is the name of the template you already created in your MS CA.
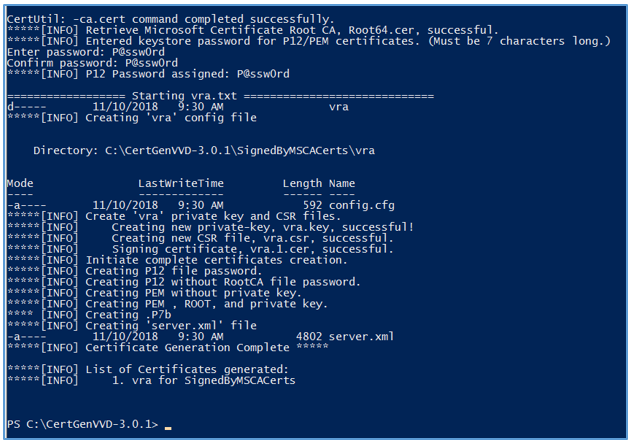
You will be prompted to enter keystore password for pem certificates to be generated.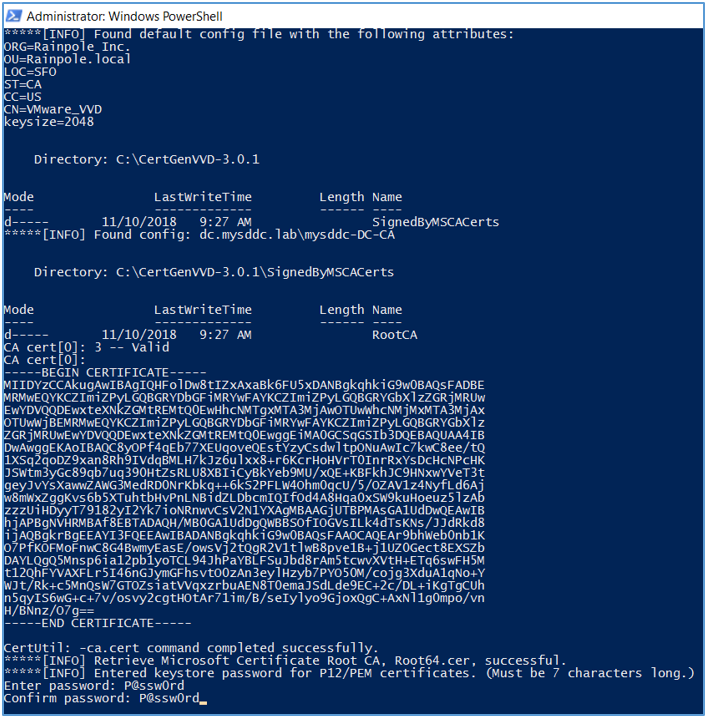
-
In case you need to specify a specific CA authority for certificates to be generated from, you can use the below command:
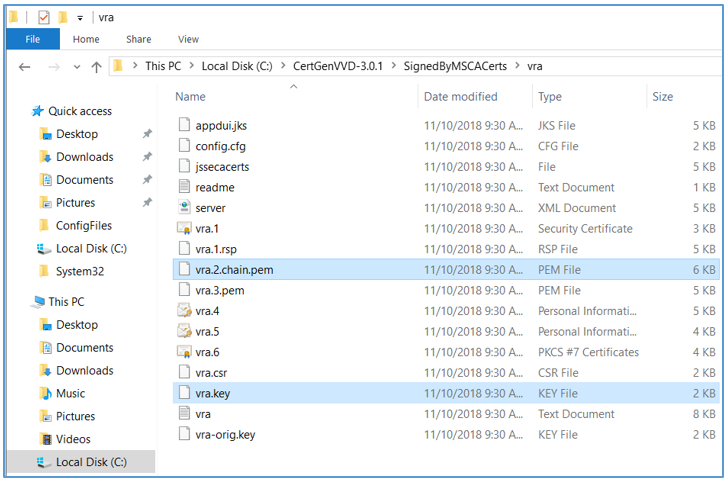
.\CertGenVVD0<version>.ps1 -MSCASigned -attrib ‘CertificateTemplate:<TemplateName>’ -config ‘<CA Server FQDN>\<CA Name>’ - The utility will create a subfolder named SignedByMSCACerts in the C:\CertGenVVD-3.0.1 folder, which will contain the certificate chain PEM file and private key file for each solution in a separated folder (VRA in our case). You will use these 2 files to replace certificates on VRA using the installation wizard.
Hope this post is informative,
Thank you for reading,
Mohamad Alhussein
 (1 votes, average: 5.00 out of 5)
What account are you using to run the CertGenVVD.ps script? Also, what permissions must this account have on the CA server – as a normal domain user account will not be able to issue certs?
Hi Sam,
I normally use an admin account to issue certificate. However you can use a normal domain user that has access to the Certificate Authority Web enrollment. To specify a username, add these options to the command -username YourDomain\YourUsername -password YourPassword