
Recently I have been working with a NSX-T engagement in a customer environment where they have NSX-v for their production environment and they requested to implement NSX-T in their UAT environment to test NSX-T functionality prior to migrating the production environment from NSX-v to NSX-T.
As they spin up a lot of VMs in their UAT environment for the sake of testing and as they don’t want to expose their production DHCP server to assign IP addresses to their UAT environment, they asked if we can offer them a separate DHCP service within the NSX-T environment.
In this article, we will explore the DHCP service available in NSX-T and walk-through the implementation steps to configure it and attach it to a NSX-T segment.
Introduction
DHCP is used to automate IP address assignment by providing client IP address, gateway address, DNS server address and other information to client without administrator intervention.
DHCP services are commonly used in one of the following ways:
- To create DHCP servers to handle DHCP requests on a logical switch.
- To create a DHCP relay service on a router port where NSX-T will relay DHCP requests to an external DHCP server in your environment.
NSX edge cluster is a pre-requisite for DHCP service to run. A DHCP server or relay can be attached to either a Tier-1 or Tier-0 gateway.
Configuration
The below diagram summarizes the flow of steps that you should follow to configure a DHCP server in NSX-T.

Here under is a step-by-step Walk-through of the configuration steps needed for a functional NSX-T 2.4 DHCP server running on Tier-1 gateway.
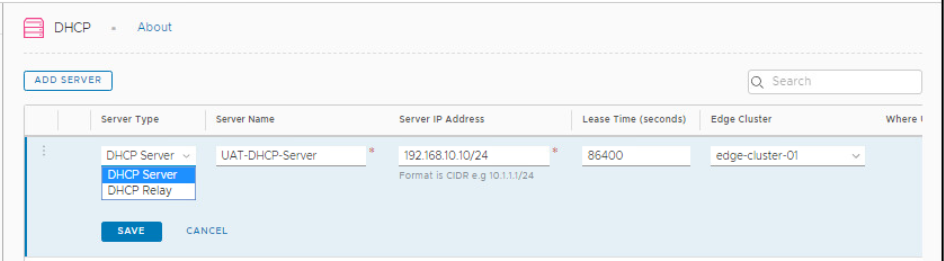
Create DHCP Server
Login to NSX-T manager and navigate to Networking > IP Address Management > DHCP.

Click ADD SERVER. Configure these parameters: Server Type = DHCP Server, Server Name, Server IP Address, and connect the DHCP server to an available edge cluster. Click Save when you are done.

Configure Tier-1 gateway with DHCP server
Navigate to Networking > Tier-1 Gateway. Click the 3 ellipses beside your Tier-1 gateway to edit it.
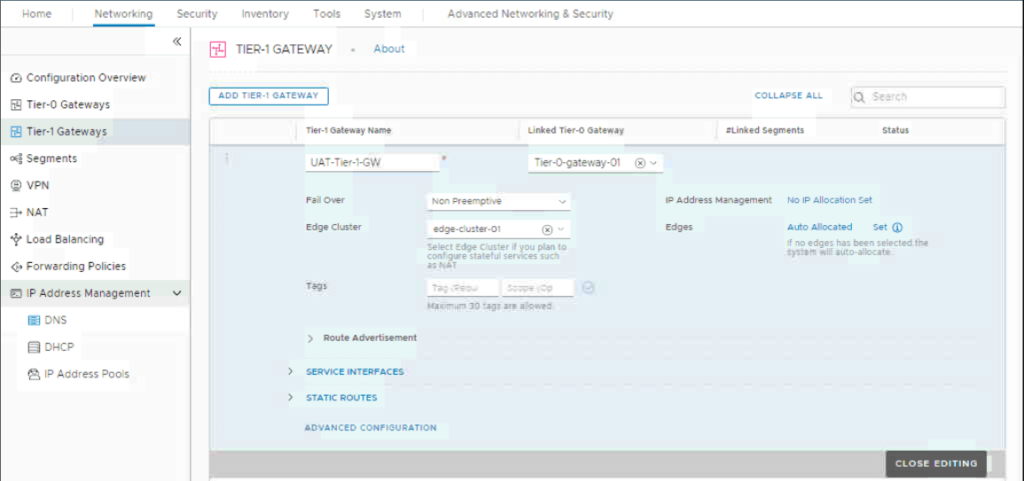
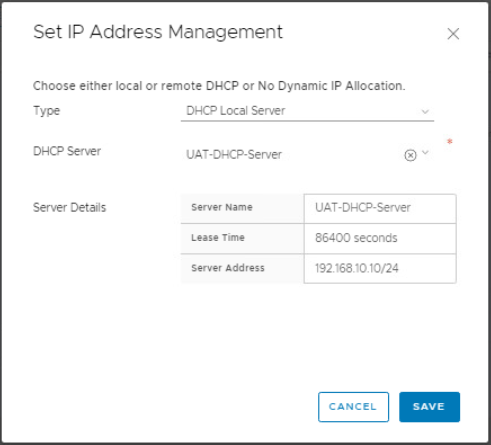
Click on “No IP Allocation Set” and select the local DHCP server you already created for the IP address management.
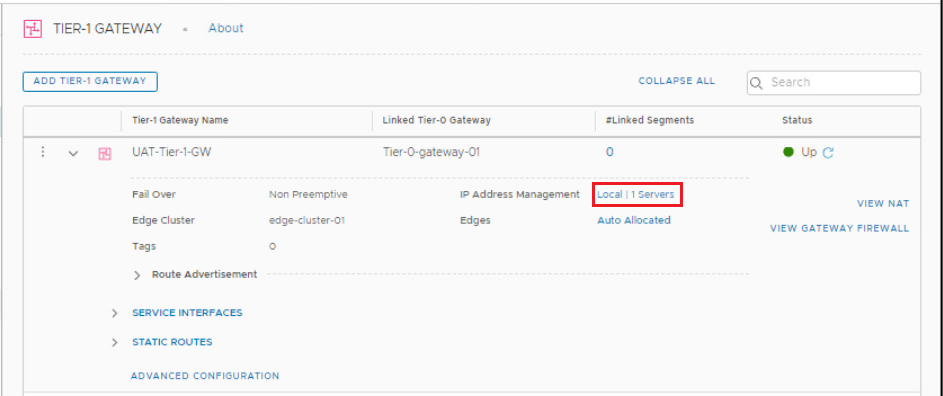
Click Save and then Close Editing.
Create a segment and configure DHCP IP Address range
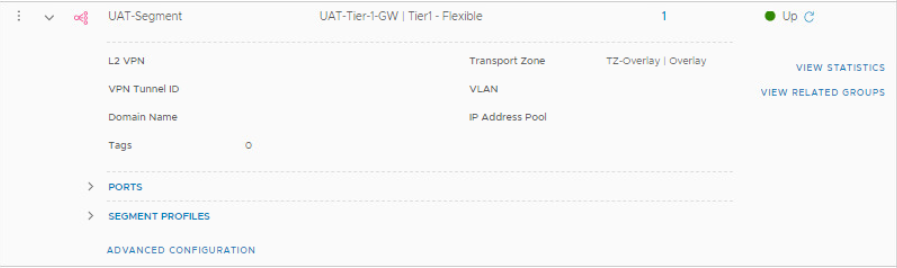
Navigate to Networking > Segments. Click Add Segment. Fill out Segment name, connect the segment to your Tier-1 gateway and select the overlay Transport zone.
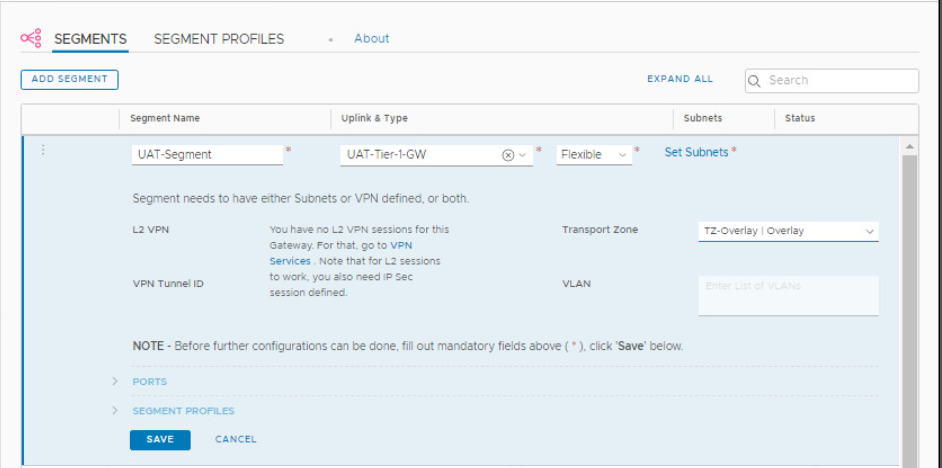
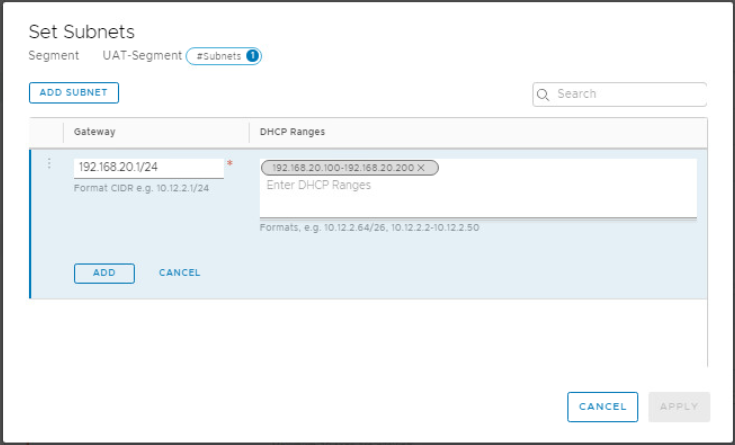
Click Set Subnets > Add Subnet. Fill out the gateway address and the DHCP range. Click Add > Apply > Save.
Attach VM to the Segment
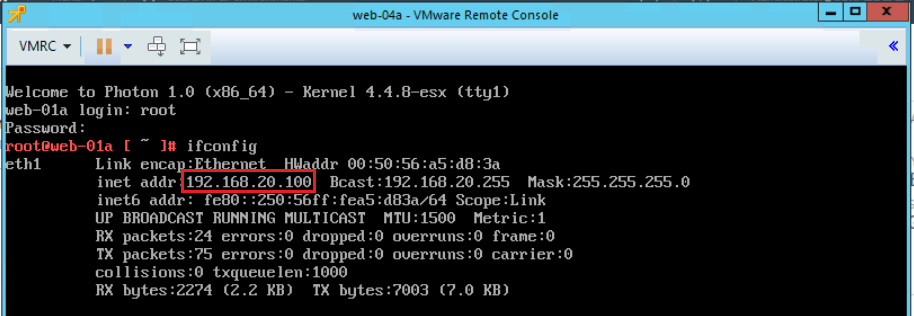
Login to your vCenter server then edit the settings of your VM to connect it to the created NSX-T segment.
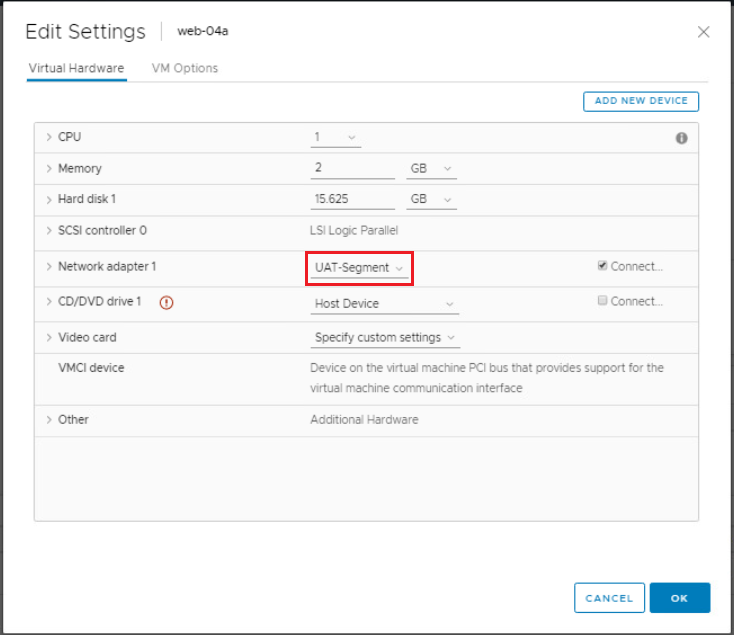
Make sure your VM is configured to get its IP via DHCP and check if your VM gets an IP address from the configured NSX-T DHCP server. Notice that it got the first IP address from the DHCP range 192.168.20.100-200.
Hope this post is informative,
Mohamad Alhussein
 (1 votes, average: 5.00 out of 5)
One thought
Comments are closed.