
Introduction
Network address translation (NAT) in NSX-T Data Center can be configured on Tier-0 and Tier-1 gateways. Different types of NAT rules can be configured:
- Source NAT (SNAT): Supported on Tier-0/Tier-1 gateways running in active-standby mode.
- Destination NAT (DNAT): Supported on Tier-0/Tier-1 gateways running in active-standby mode.
- Reflexive NAT (Stateless NAT): This is used on Tier-0 gateways running in active-active mode when stateful NAT might lead to asymmetric paths.
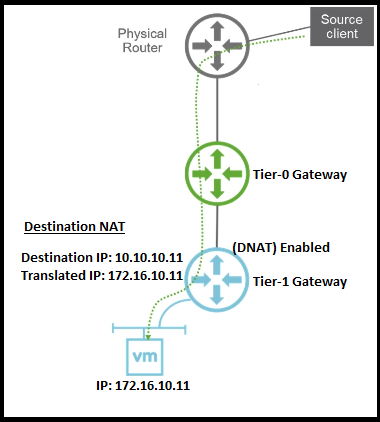
In this post we will focus on configuring NSX-T 2.4 destination NAT service on Tier-1 gateway level.
Configuration
Here under we will walk-through the required steps to configure a destination NAT (DNAT) on NSX-T Tier-1 gateway.
This is the topology for this configuration.
Create a Tier-1 gateway
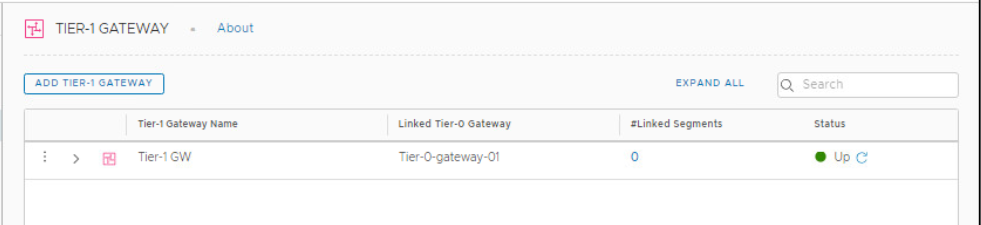
Login to your NSX-T manager and navigate to Networking > Tier-1 Gateway.
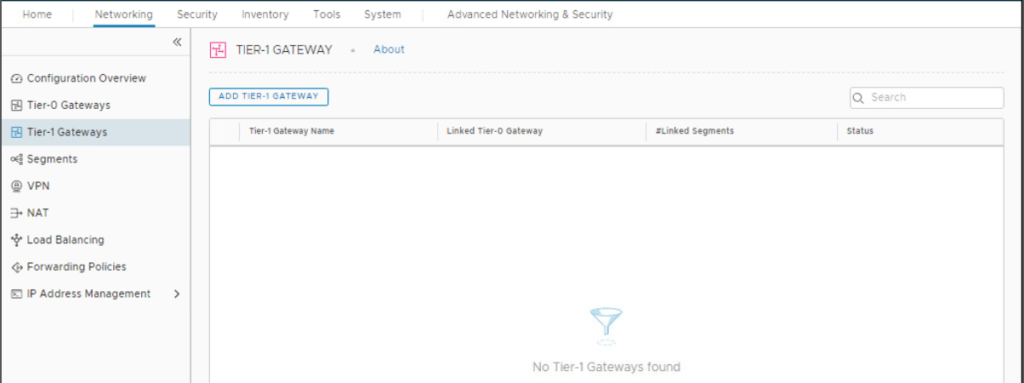
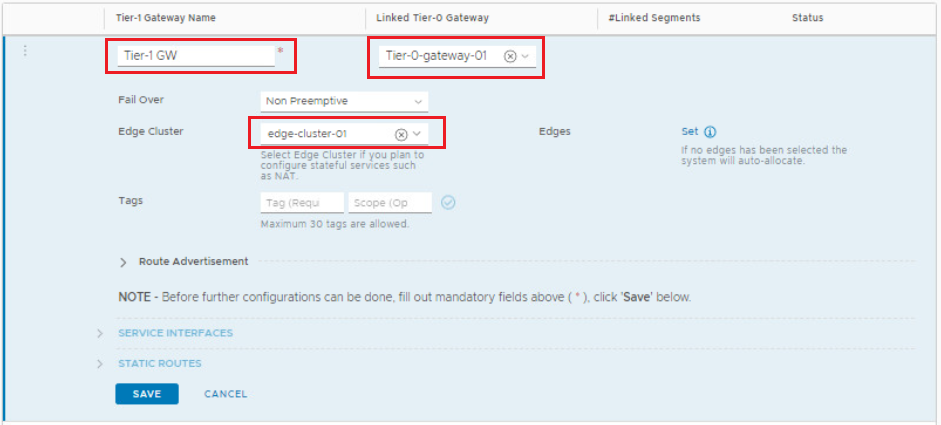
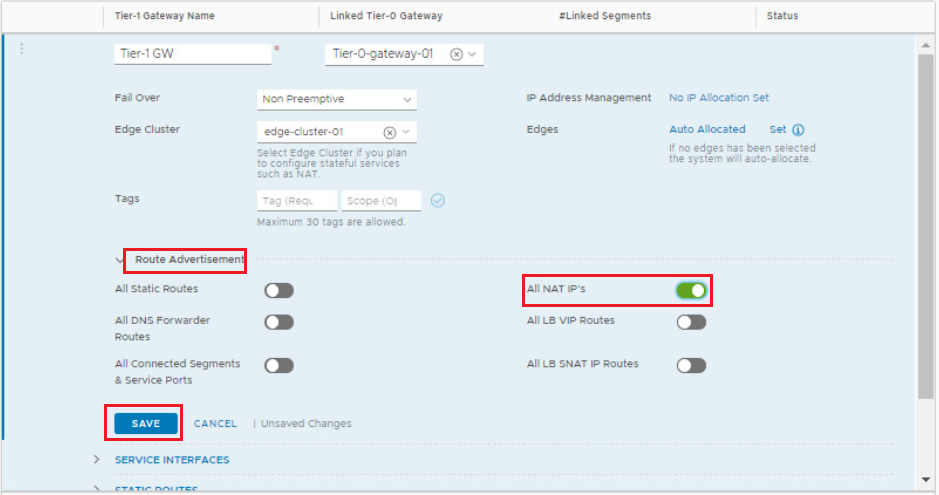
Click ADD Tier-1 Gateway. Name the new Tier-1 gateway, link it to your Tier-0 gateway and specify the edge cluster for the NAT service to run on. Click Save to save your settings.
Note that selecting an edge cluster is mandatory as the NAT service will be offered by the Tier-1 gateway SR component running on the edge cluster.
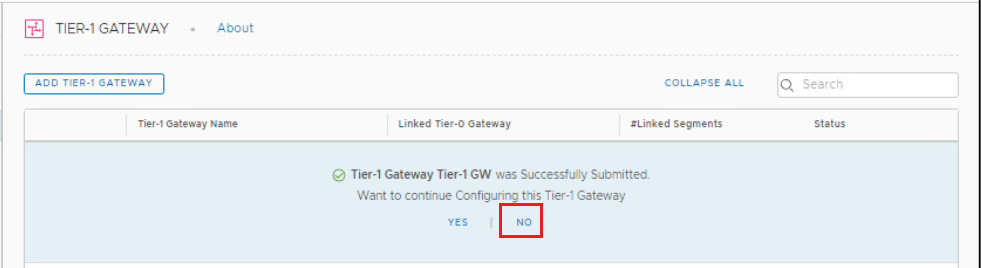
Click No when you are prompted to continue configuring Tier-1 gateway.
Enable Route Redistribution of NAT IPs on Tier-1 Gateway
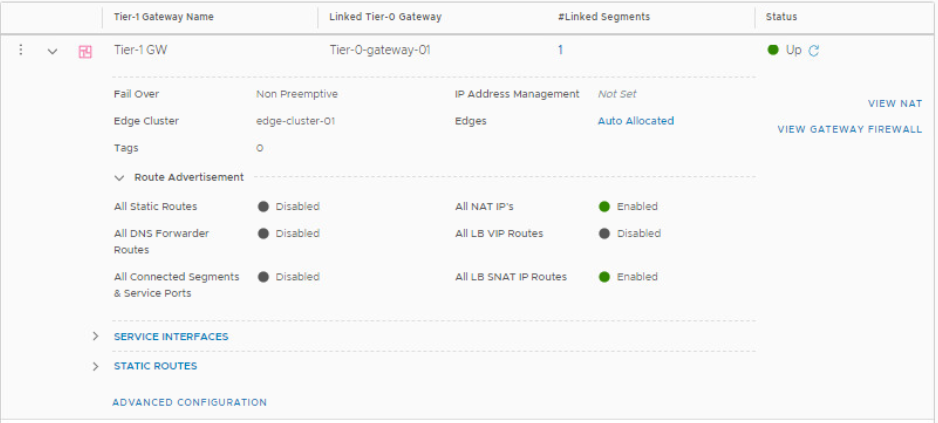
Click on the 3 dot ellipses beside the Tier-1 gateway and click on Edit, navigate to the Route Redistribution section and enable the redistribution of all NAT IP addresses. Click Save > Close Editing when you are done.
Make sure that Route Redistribution of NAT IPs is enabled on Tier-0 Gateway
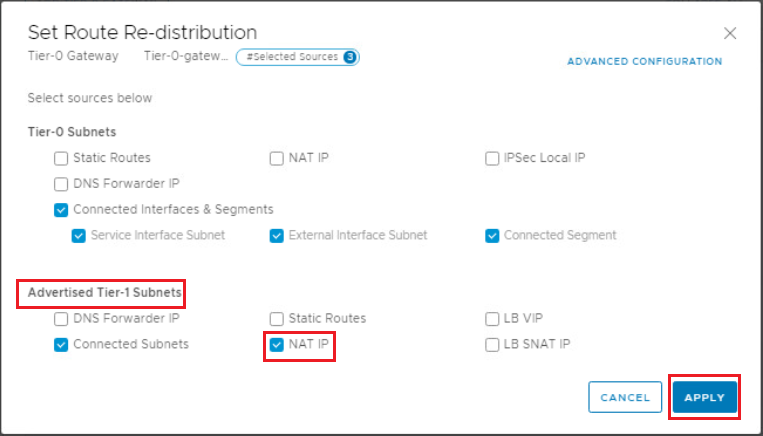
Click on the 3 dot ellipses beside the Tier-0 gateway and click on Edit, navigate to the Route Redistribution section and click the number beside Route Redistribution.
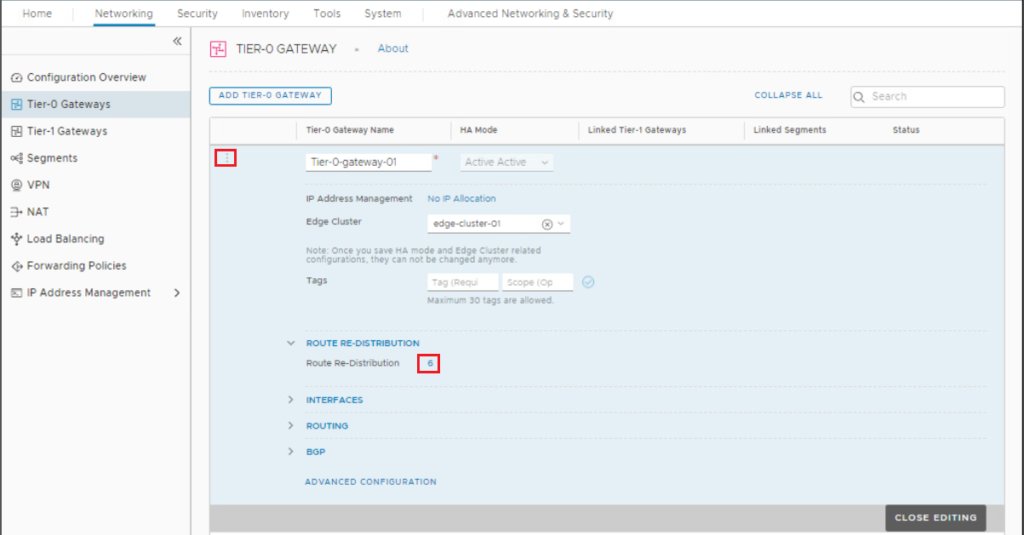
Make sure that NAT IPs checkbox under Advertised Tier-1 subnets is enabled. If not, enable it.
Create a Segment and attack it to Tier-1 GW
Navigate to Networking > Segments, and click Add Segment.
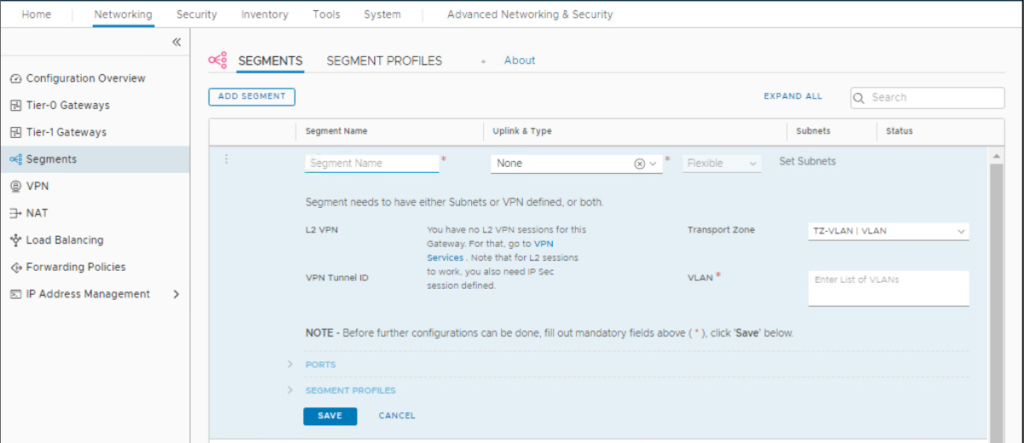
Fill out the segment name, attach it to the previously created Tier-1 gateway, and select the overlay transport zone.

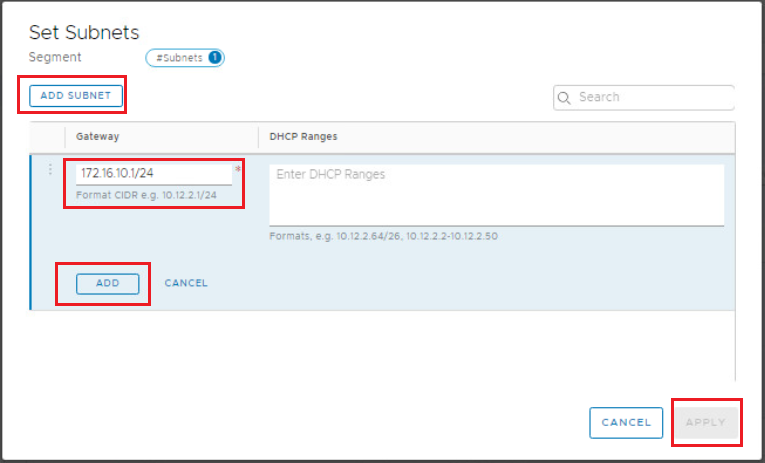
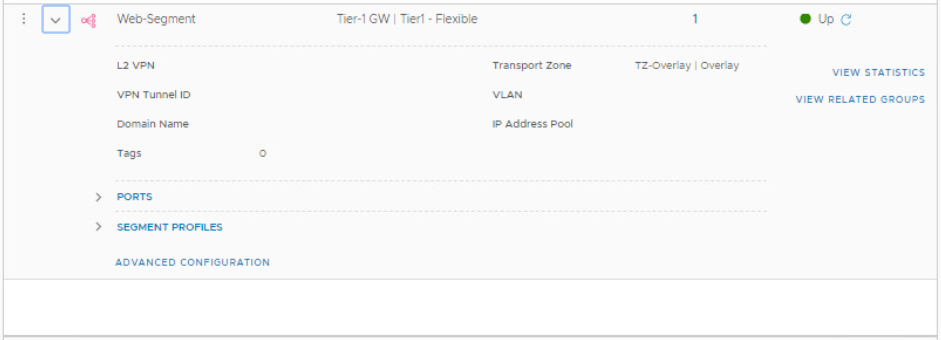
Click on Set Subnets > Add Subnet and configure the gateway address for that segment. Click ADD > Apply then Save when you are done.
Attach your VM to the overlay segment
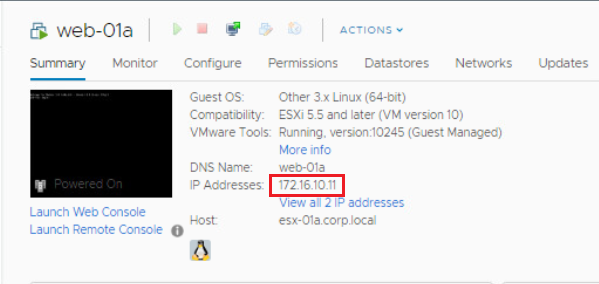
Login to your vCenter, Edit the VM settings and make sure the network adapter is connected the the segment you created in previous step.
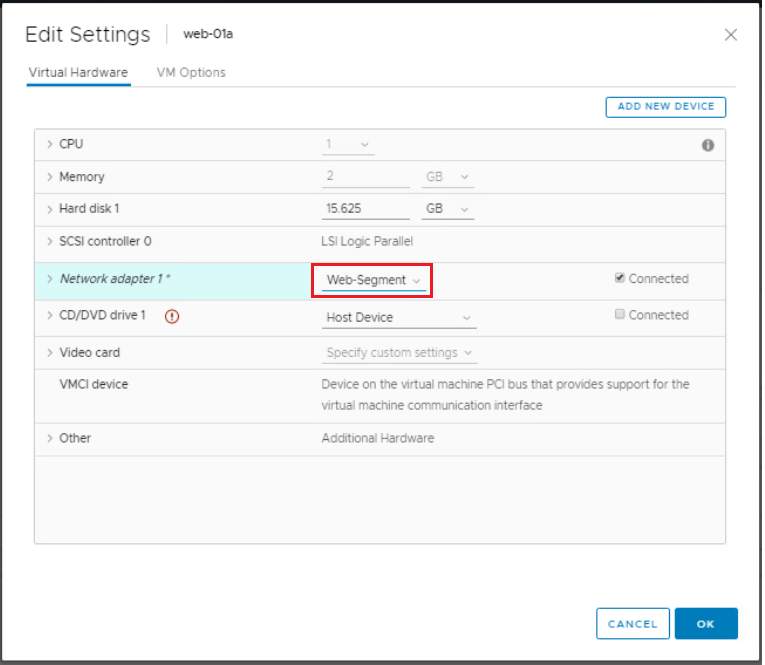
Notice that the VM IP is 172.16.10.11. What we will do in this exercise is to NAT an external IP to that internal IP address.
Create DNAT rule
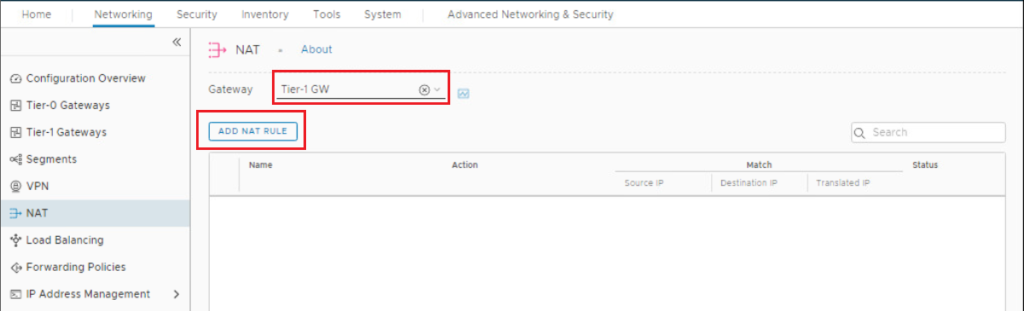
Navigate to Networking > NAT, and select your Tier-1 gateway (Remember you can configure NAT on either Tier-0 or Tier-1 gateway). Click Add NAT Rule.
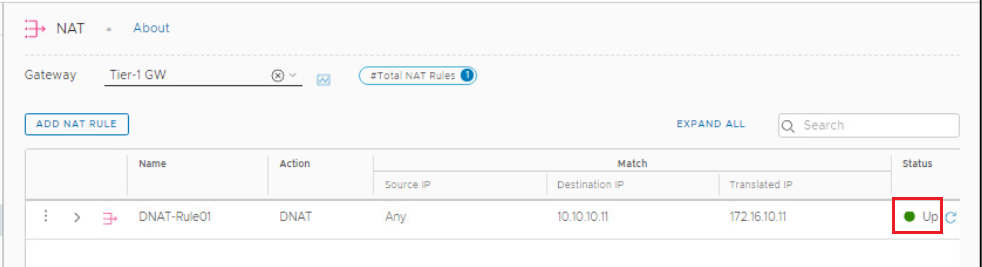
Configure Rule name, select NAT type as DNAT ( you have the options to select SNAT, DNAT, or Reflexive NAT), configure the destination IP (external IP Address), and translated IP (original VM IP Address), then click Save.
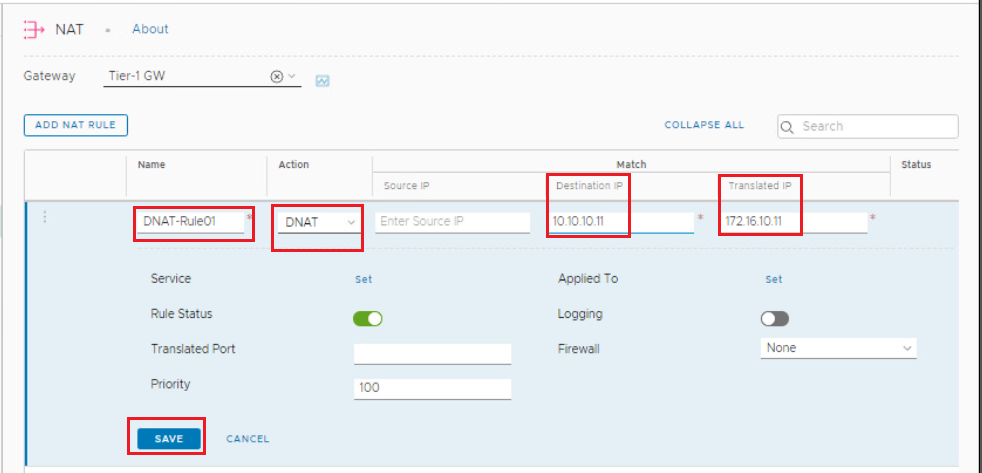
Confirm that the status of the created DNAT rule is UP.
Test your DNAT rule
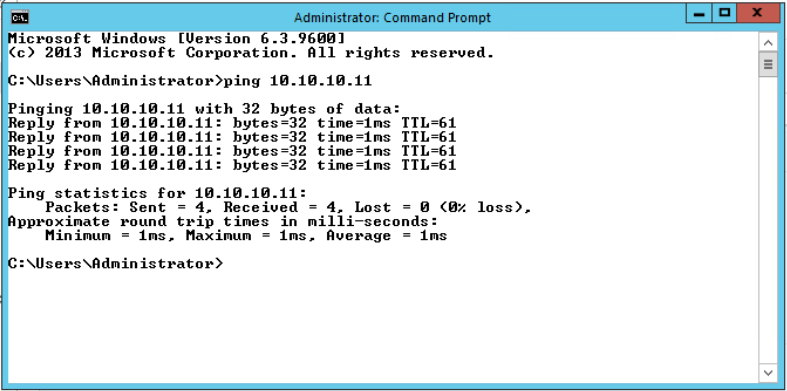
Let’s ping to the external IP address we configured in the NAT rule and check the connectivity.
Hope this post is informative,
Mohamad Alhussein
 (1 votes, average: 5.00 out of 5)
hi hope you are safe and sound! I have a question, in the DNAT where we should set the External interface? Does it mean that IP is the same IP on the external uplink Tier0 interface?