
This is part2 of my 3-parts NSX-T series that illustrates the complete step-by-step procedure to replace the self-signed certificates for NSX-T 3.x manager cluster with MS-based CA-signed certificates.
In part1 of this series, I configured a MS-based Certificate Authority server and created the certificate template for NSX-T.
In this part, I will walk you through the steps needed to prepare the Certificate Signing Request (CSR) files and issue the corresponding certificates based on the NSX-T template from our CA server.
Step1: Generate Certificate Signing Request (CSR) files
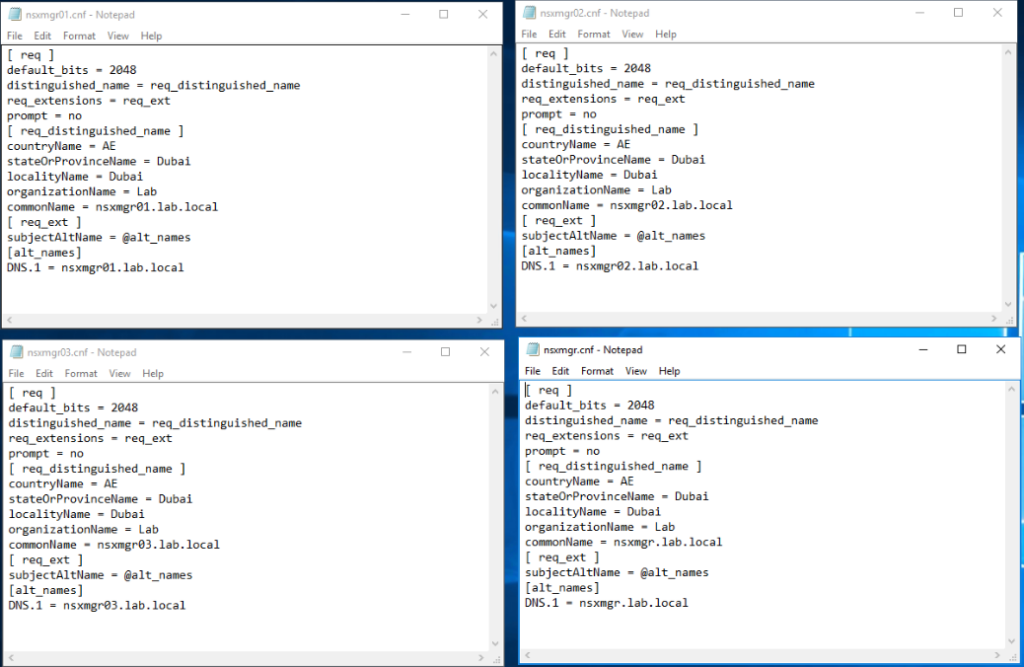
First of all, we will create a .cnf file for each of the 3 NSX-T manager nodes we have and for the cluster VIP. Based on these .cnf files, we will generate the corresponding CSR files via OpenSSL.
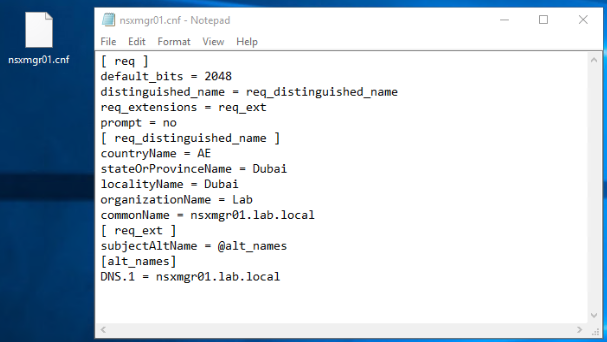
Hereunder is the template to use for the .cnf file. The values marked in bold will be changed according to your settings.
[ req ]
default_bits = 2048
distinguished_name = req_distinguished_name
req_extensions = req_ext
prompt = no
[ req_distinguished_name ]
countryName = <AE>
stateOrProvinceName = <Dubai>
localityName = <Dubai>
organizationName = <Lab>
commonName = <FQDN of NSX-T manager node or cluster VIP>
[ req_ext ]
subjectAltName = @alt_names
[alt_names]
DNS.1 = <FQDN of NSX-T manager node or cluster VIP>
I will show you the .cnf file for the first NSX-T manager node (nsxmgr01.cnf). The files for the remaining 2 NSX-T manager nodes and the cluster VIP are prepared in the same way.
The same process will be repeated to have a .cnf file for each NSX-T manager node and for the cluster VIP.
Next, we will use OpenSSL to generate a .csr and .key file from each corresponding .cnf file. For the first NSX-T manager node, the command will look like the below:
openssl req -nodes -newkey rsa:2048 -keyout nsxmgr01.key -config nsxmgr01.cnf -out nsxmgr01.csr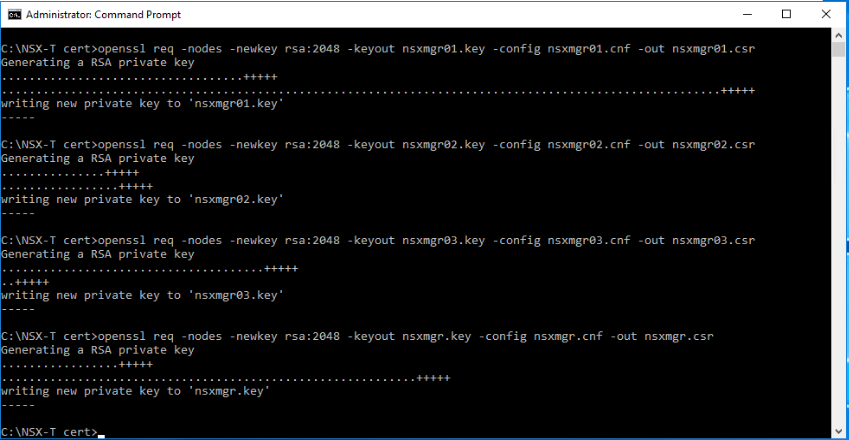
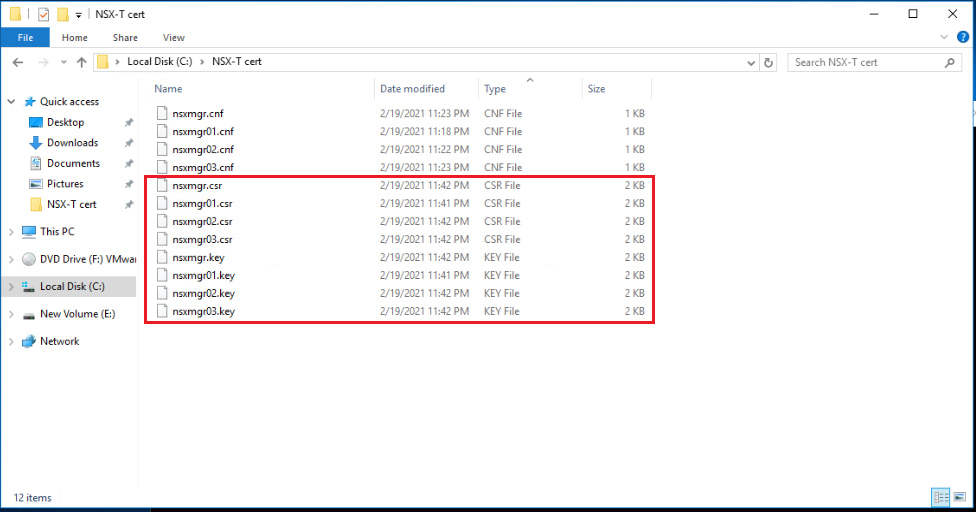
At this stage, we should have a .csr and .key pair for each node and for the cluster VIP as shown below. The .key files will be uploaded to the NSX-T manager in a later stage, while the .csr files will be used in the next step to generate the .cer certificate files.
Step2: Generate Certificate files
The same procedure will be used for each NSX-T manager node and for the cluster VIP. Let’s use the CSR for the first NSX-T manager node to generate the corresponding certificate file.
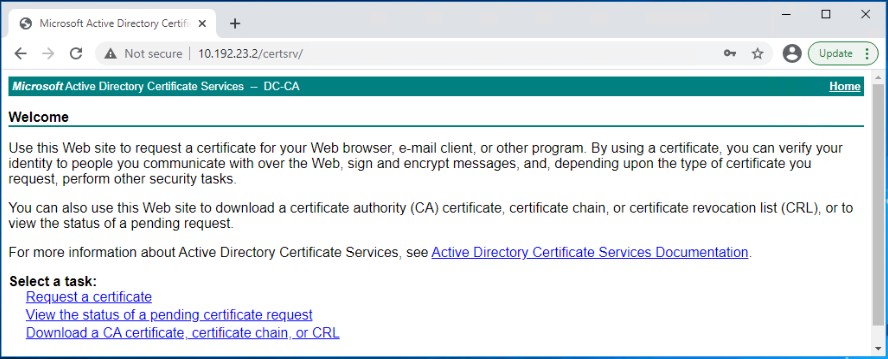
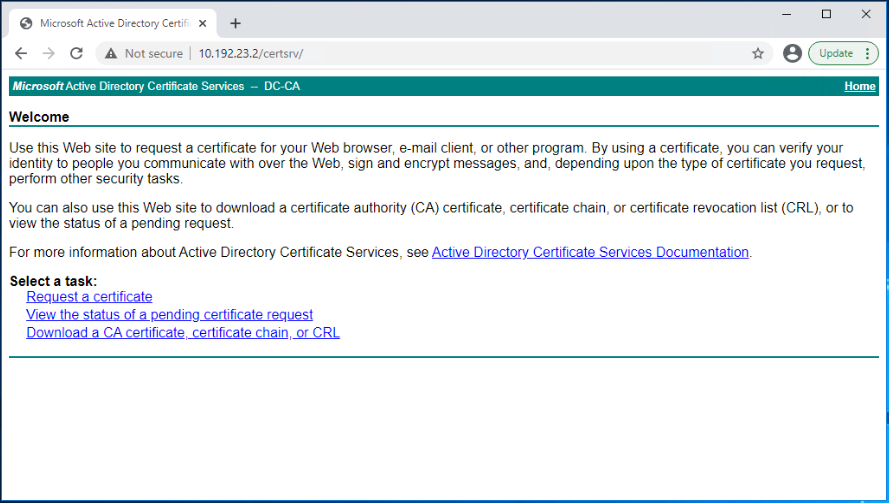
Login to the CA web enrollment portal and select Request a certificate.
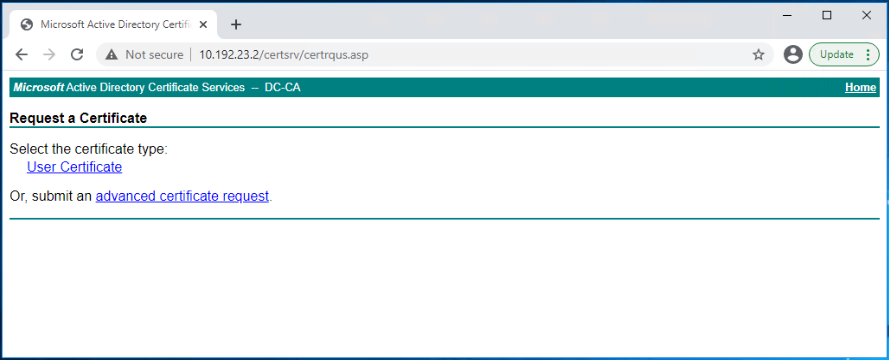
Click on Advanced certificate request.
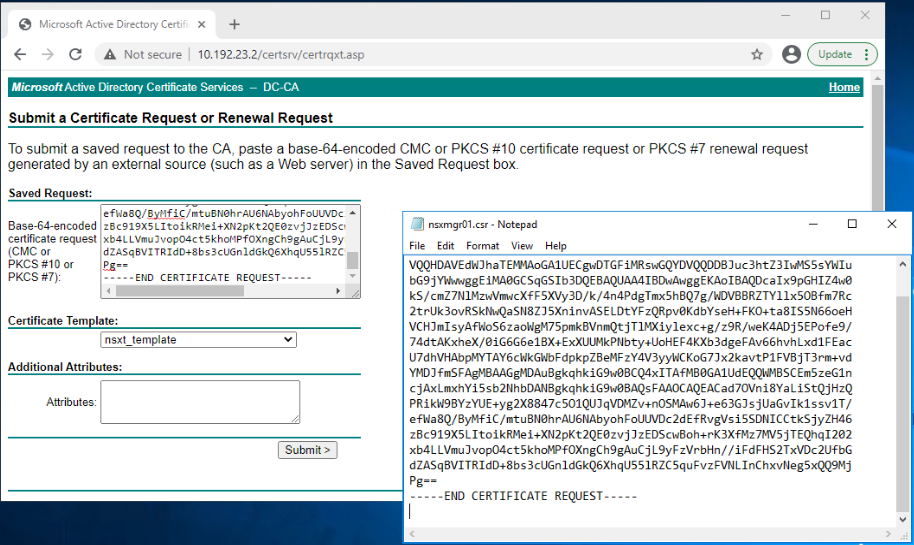
Now you need to copy the contents of nsxmgr01.csr file and paste them in the Saved Request text box.
In the Certificate Template dropdown box, select the NSX-T template that we already created in part1 of this series.
Click Submit.
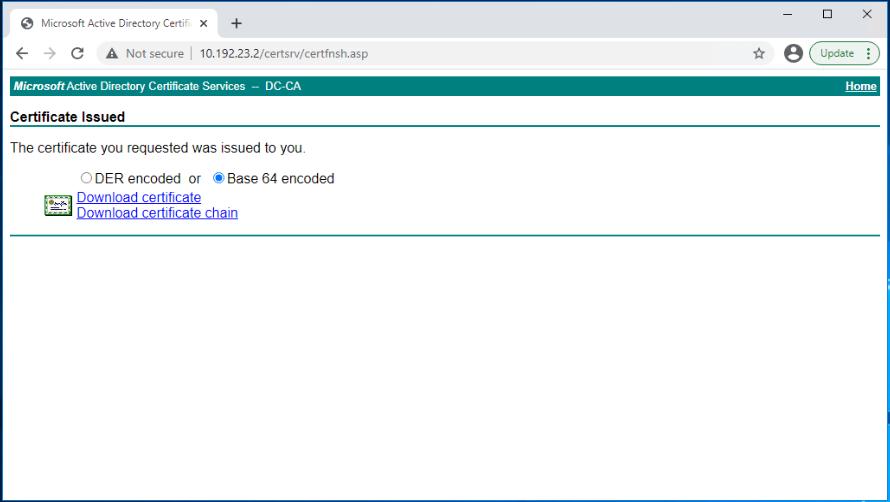
Select Base 64 encoded, and click on Download certificate.
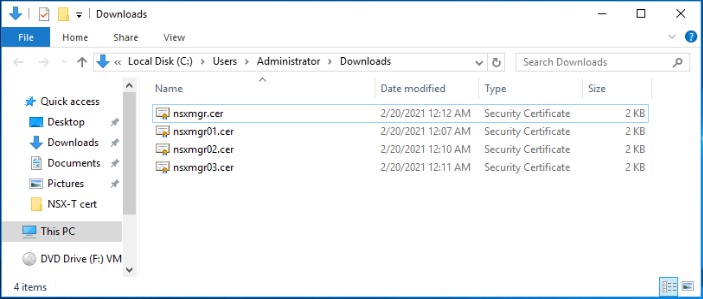
The result is a nsxmgr01.cer certificate file. Repeat the same steps to generate the other certificate files as shown below.
The last needed piece is the root CA certificate file.
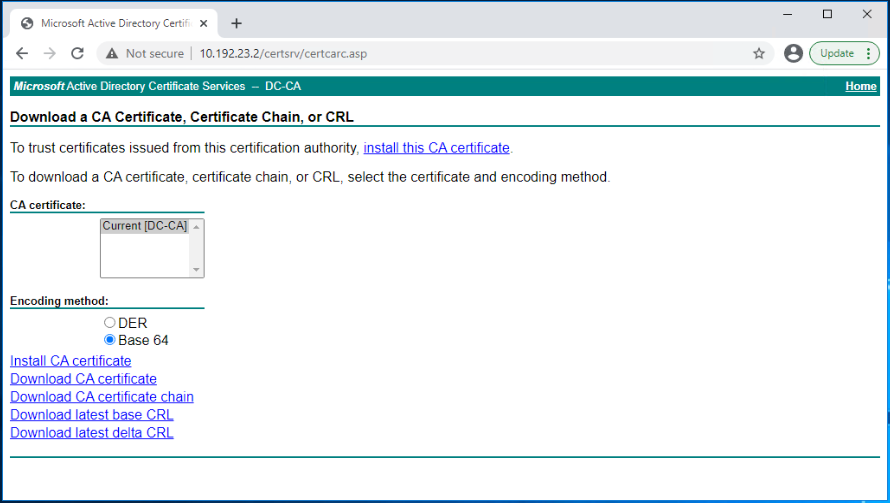
Login to the CA web enrollment portal and select Download a CA certificate, certificate chain or CRL.
Select Base 64 as the encoding method, and click on Download CA certificate.
Below is the full list of the generated certificate files.

We are done!!
In part3 of this series, I will walk you through the steps needed to upload the certificates to the NSX-T manager as well as activating the new CA-signed certificates via REST API. Stay tuned !!
I hope this post was informative.
Many thanks for reading.
 (1 votes, average: 5.00 out of 5)
6 thoughts
Comments are closed.