
This is part3 of my 3-parts NSX-T series that illustrates the complete step-by-step procedure to replace the self-signed certificates for NSX-T 3.x manager cluster with MS-based CA-signed certificates.
In part1 of this series, I configured a MS-based Certificate Authority server and created the certificate template for NSX-T.
In part2, I prepared the Certificate Signing Request (CSR) files and issue the corresponding certificates based on the NSX-T template from our CA server.
In this part, I will walk you through the steps needed to import the certificates into the NSX-T manager, activate them via REST API, and finally validate the results.
Step1: Import the CA-signed Certificates into the NSX-T manager
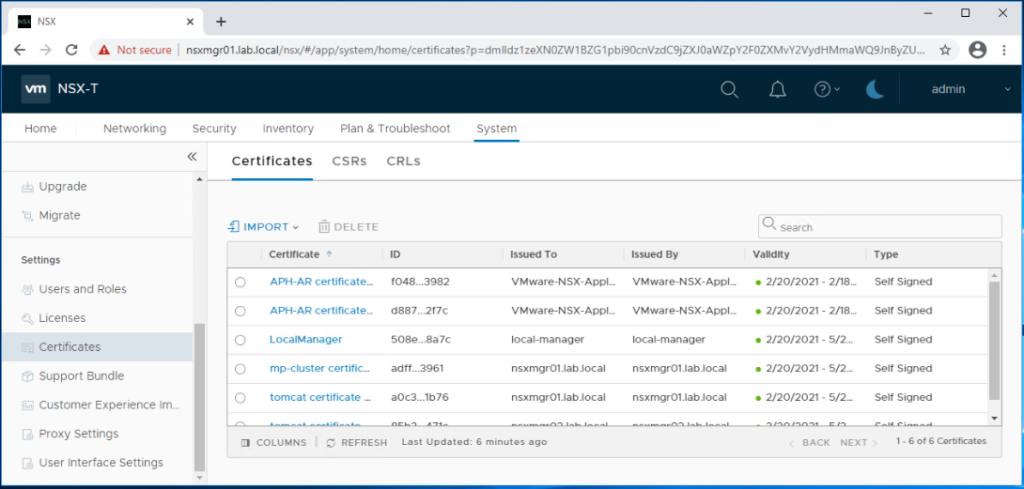
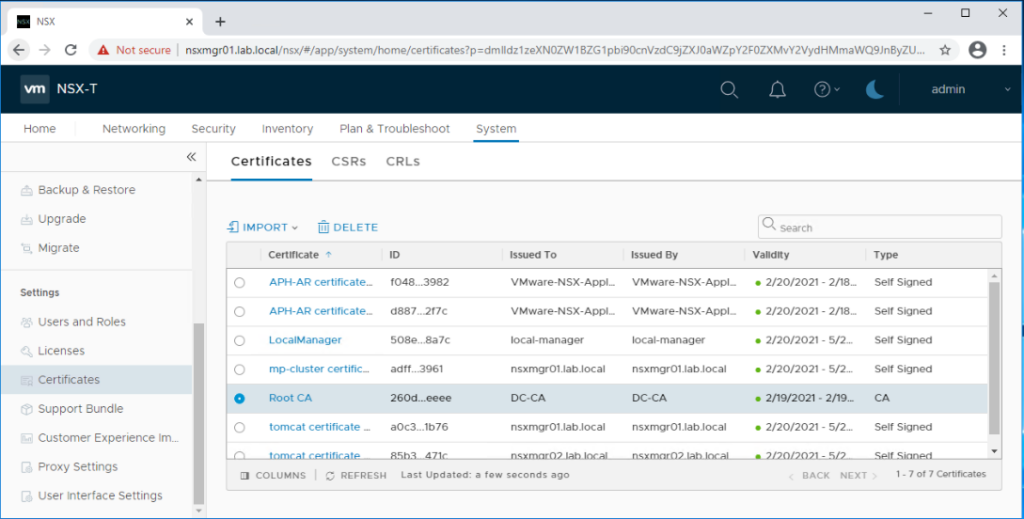
Login to the NSX-T manager admin portal and navigate to System > Settings > Certificates.
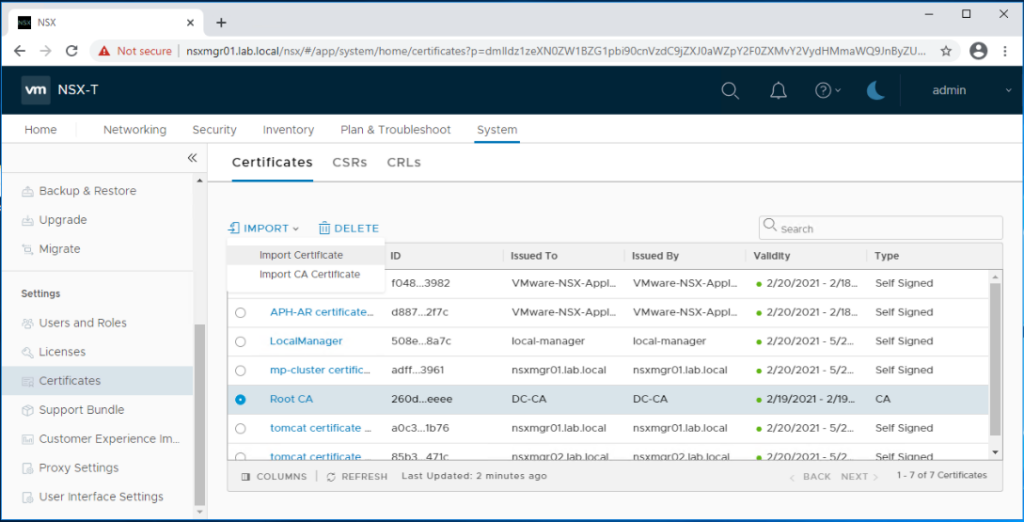
First we will upload the CA root certificate. Click on Import > Import CA Certificate.

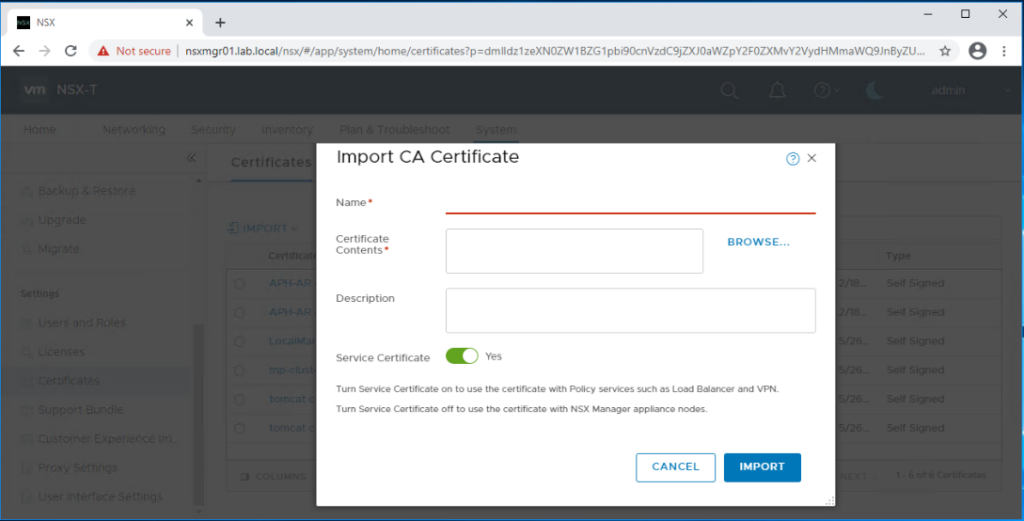
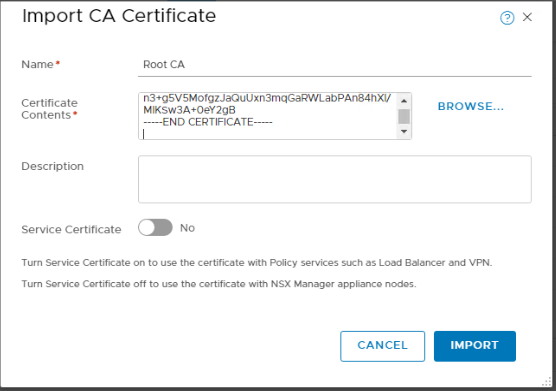
Enter a name for the CA root certificate.
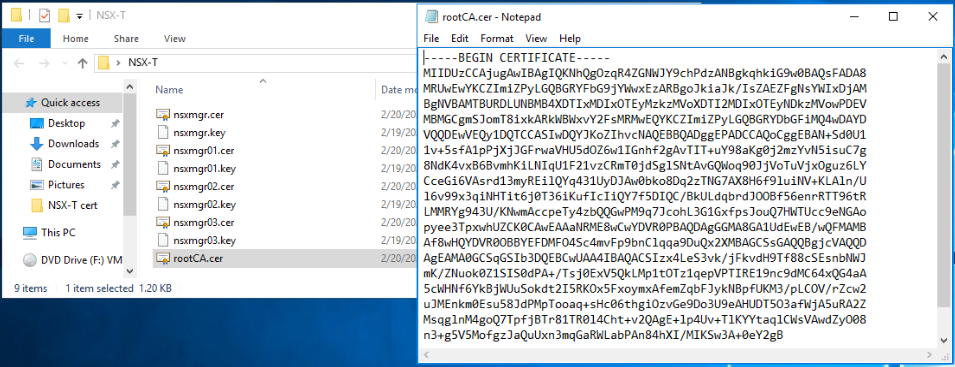
Copy the content of the root CA certificates .cer file into the Certificate Contents textbox.
Toggle off Service Certificate, and click on Import when you are done.
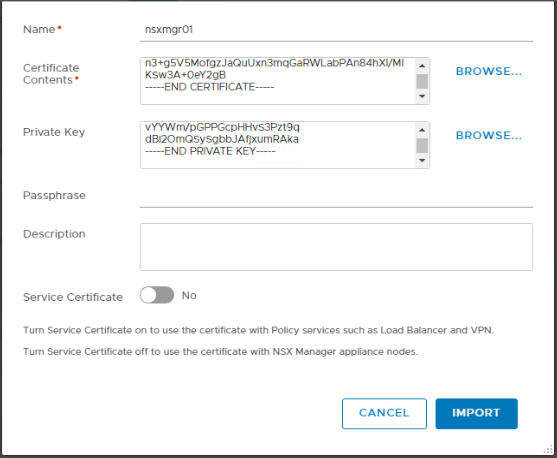
Next, we need to import the certificates for the three NSX-T managers and for the cluster VIP. Let’s import the certificate for first manager node.
Click on Import > Import Certificate.
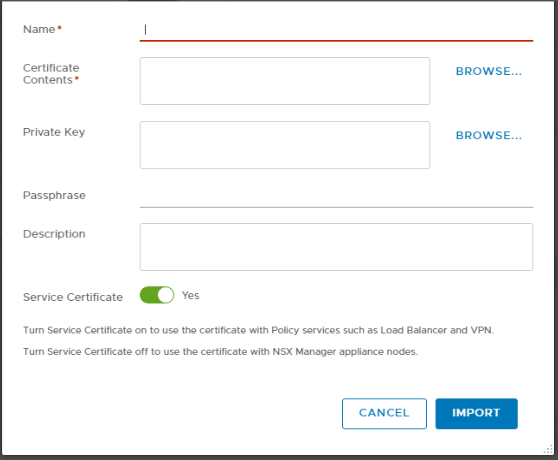
Enter a name for the CA-signed certificate.
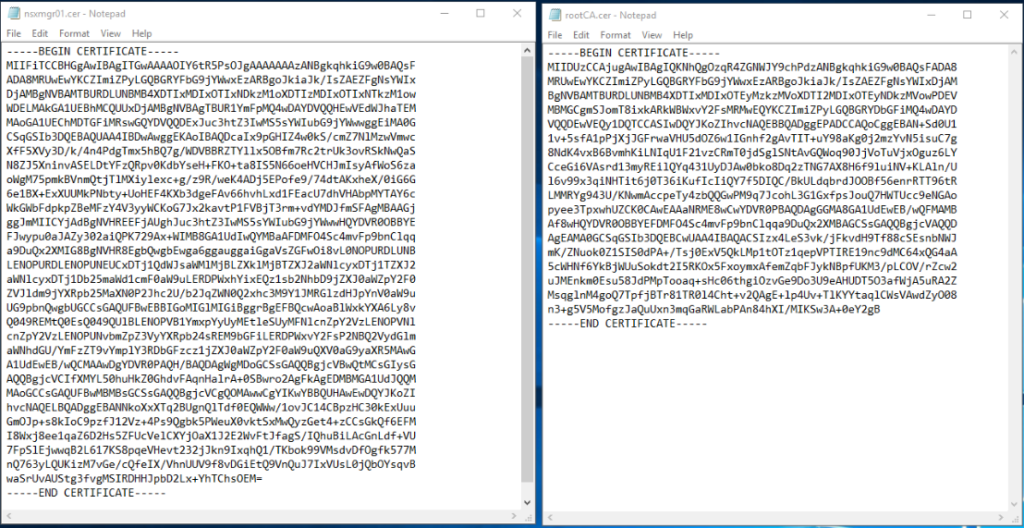
In the Certificate Contents textbox, you need to copy the full chain of NSX-T manager certificate in the below order:
—–BEGIN CERTIFICATE—–
NSX-T Manager or cluster VIP Cert
—–END CERTIFICATE—–
—–BEGIN CERTIFICATE—–
CA Root Cert
—–END CERTIFICATE—–
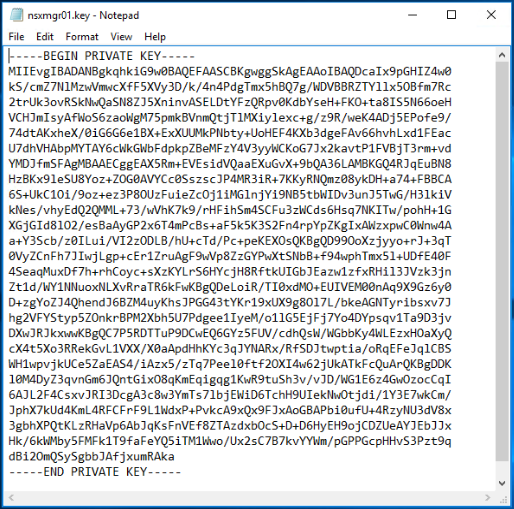
In the private key text box, you need to copy the contents of nsxmgr01.key file.
Toggle off Service Certificate, and click on Import when you are done.

Repeat the same steps to import the certificates for nsxmgr02, nsxmgr03, and nsxmgr (cluster VIP FQDN).
Step2: Activate the imported CA-signed Certificates via REST API
Now we have all the certificates available, you need to activate them via REST API calls. I am using Postman REST API client in this demonstration.
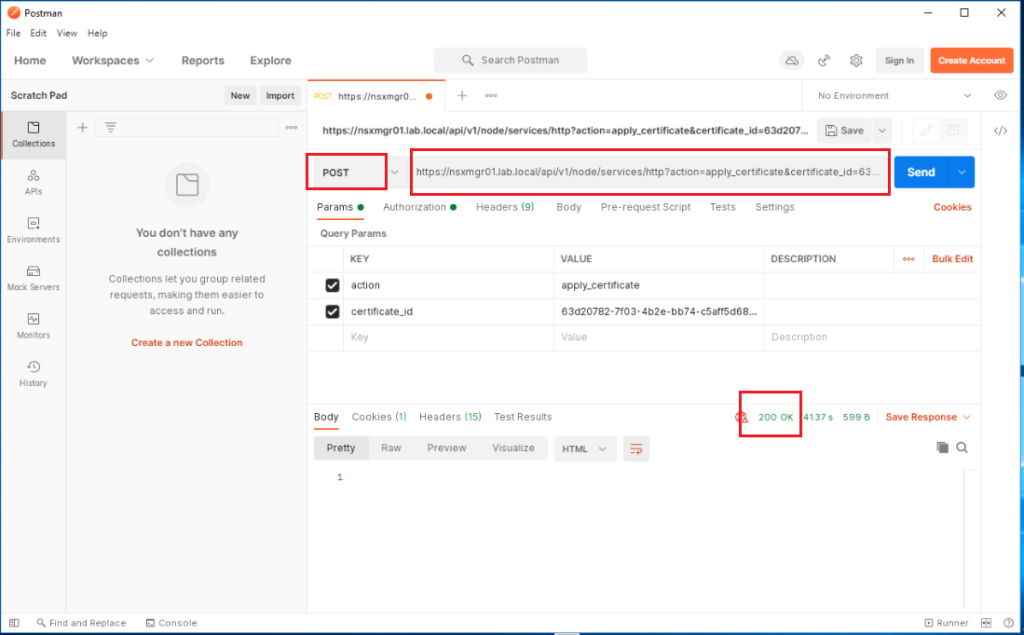
First we have to activate the certificate for each of the three NSX-T manager nodes via a POST call using the below request URL:
POST https://<NSX_mgr_FQDN>/api/v1/node/services/http?action=apply_certificate&certificate_id=<Certificate_ID>
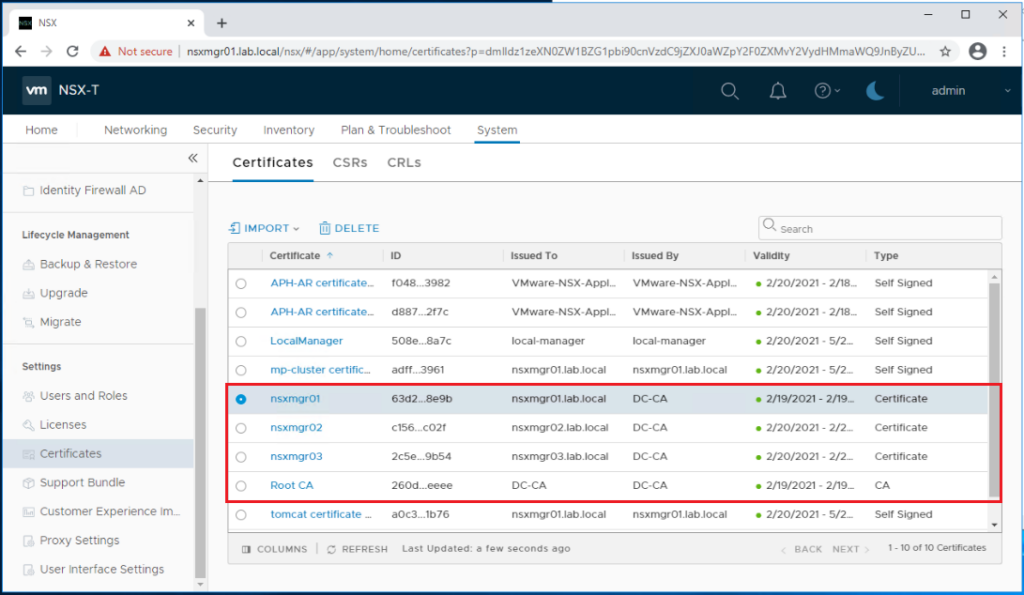
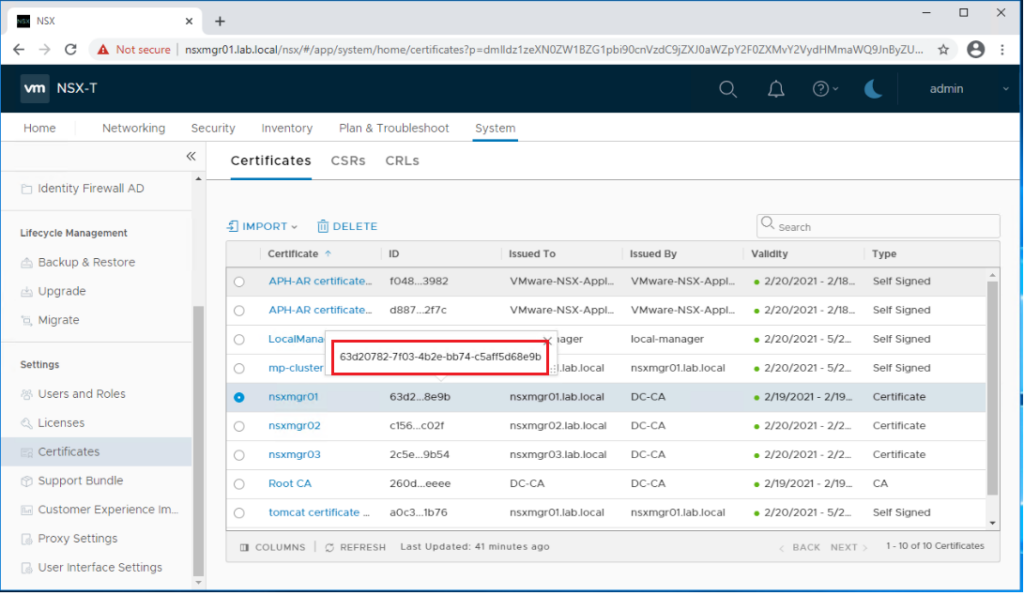
The certificate ID for each certificate can be copied from the portal as shown below.
For the first NSX-T manager node, the URL would appear as hereunder:
https://nsxmgr01.lab.local/api/v1/node/services/http?action=apply_certificate&certificate_id=63d20782-7f03-4b2e-bb74-c5aff5d68e9b
Now send a POST call using the above URL to activate the certificate on nsxmgr01.lab.local. You will get a 200 OK response if all went fine.
Verify and make sure the certificate has been replaced for the first NSX-T manager.

Repeat the same steps to activate the certificate for the remaining two NSX-T manager nodes.
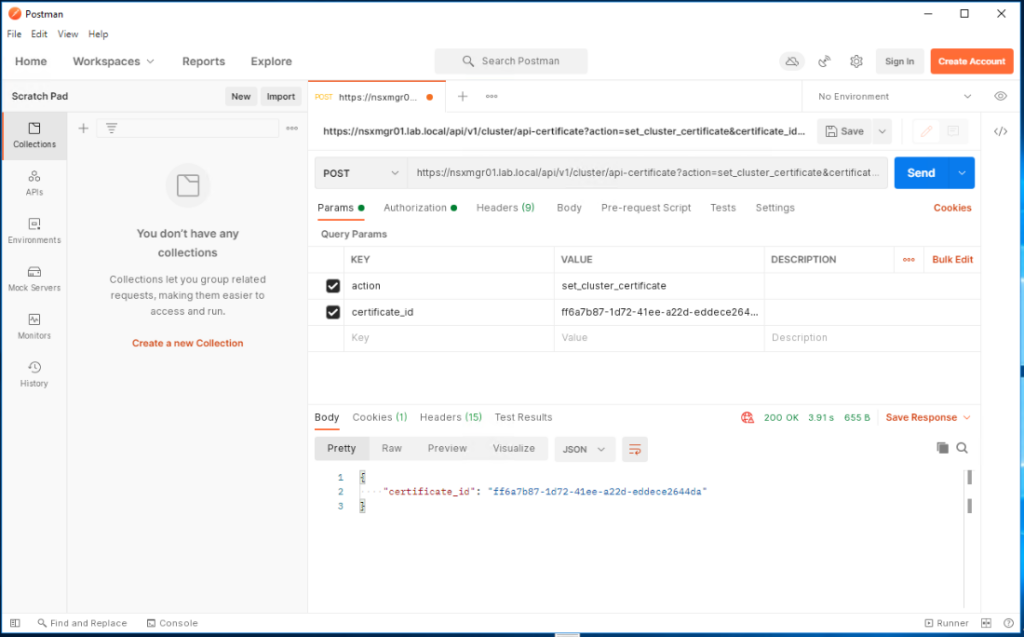
Next we need to activate the certificate for the NSX-T manager cluster VIP FQDN. The request URL is different here as show below:
POST https://<NSX_Manager_FQDN/api/v1/cluster/api-certificate?action=set_cluster_certificate&certificate_id=<Cluster_Certificate_ID>
For my NSX-T manager cluster, the URL would appear as hereunder:
POST https://nsxmgr01.lab.local/api/v1/cluster/api-certificate?action=set_cluster_certificate&certificate_id=ff6a7b87-1d72-41ee-a22d-eddece2644da
Now send a POST call using the above URL to activate the certificate for nsxmgr.lab.local. You will get a 200 OK response if all went fine.
We are done!
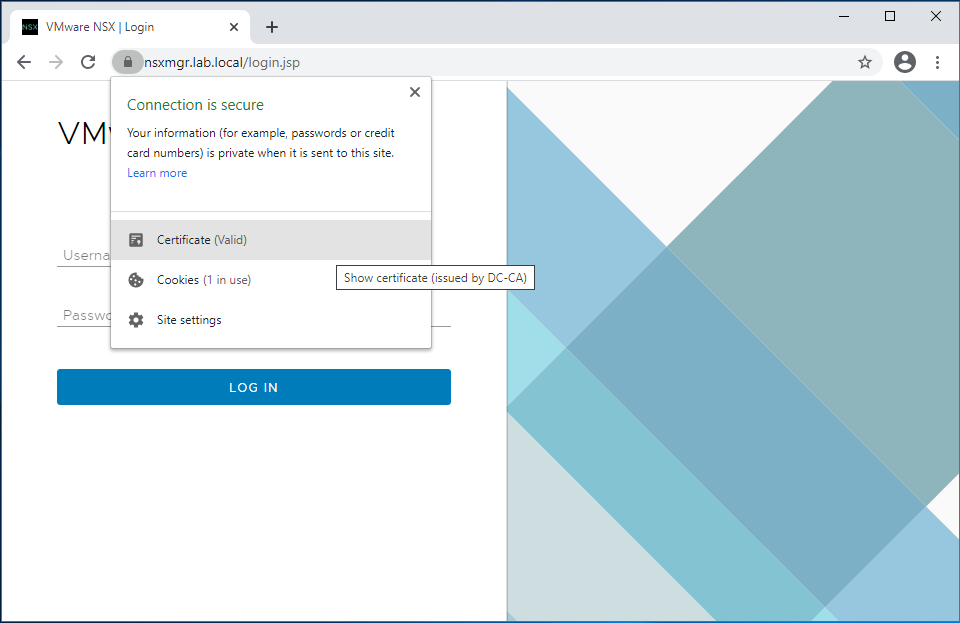
Let’s login to the NSX-T manager portal using the cluster FQDN and validate the results. Green is good 🙂
I hope this post and the entire series were informative.
Many thanks for reading.
 (1 votes, average: 5.00 out of 5)
Hi Mohamad,
Can we use the same cert (cert that includes all the node names and a cluster name with IP addresses) instead of individual certs for each node + cluster?
Thanks,