
Recently I was deploying VMware Cloud Director as part of an engagement for a Cloud Provider customer and I faced a couple of issues connecting to their Linux NFS server. I am writing this post to share with you the issues and error messages I got along with resolution steps to be able to complete the VAMI setup of the VCD cell.
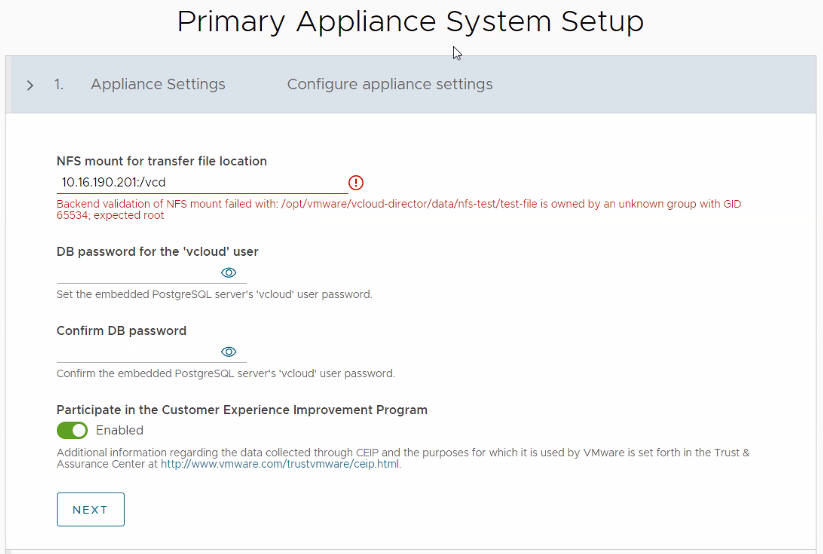
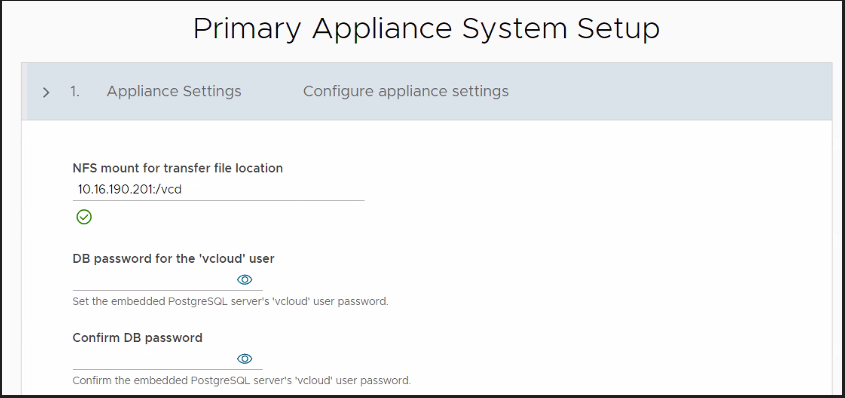
I have deployed Cloud Director 10.3.x OVA template, the template deployment itself went fine, after which I turned the Cloud Director VM on. Then, I went to VAMI interface (:5480) to continue with the setup, as per VMware documentation. At the first step “NFS mount for transfer file location”, I enter our NFS mount target 10.16.190.201:/vcd, and the validation fails with the message “Backend validation of NFS mount failed with: /opt/vmware/vcloud-director/data/nfs-test/test-file is owned by an unknown group with GID 65534; expected root” (See below screenshot).
It seems that the permission set on the NFS share are not as per the requirements outlined in documentation:
You must ensure that its permissions and ownership are 750 and root:root .
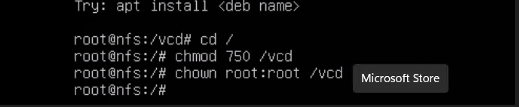
SSH to the Linux NFS server and set the permissions and ownership on the NFS share as per below:
# chmod 750 /vcd
# chown root:root /vcd
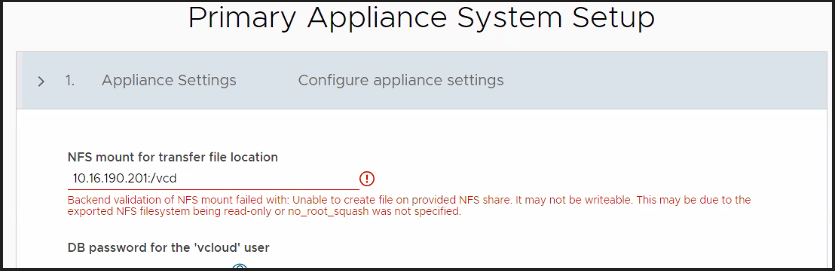
Trying to validate the NFS mount again ended up with the below error:
“Backend validation of NFS mount failed with: Unable to create file on provided NFS share. It may not be writeable. This may be due to the exported NFS filesystem being read-only or no_root_squash was not selected”.
As per the below documentation, you should use the no_root_squash method to allow read-write access to the shared NFS location for the VCD cells.
You must add the following lines to the /etc/exports file.
/nfs/vCDspace vCD_Cell1_IP_Address(rw,sync,no_subtree_check,no_root_squash)
/nfs/vCDspace vCD_Cell2_IP_Address(rw,sync,no_subtree_check,no_root_squash)
/nfs/vCDspace vCD_Cell3_IP_Address(rw,sync,no_subtree_check,no_root_squash)
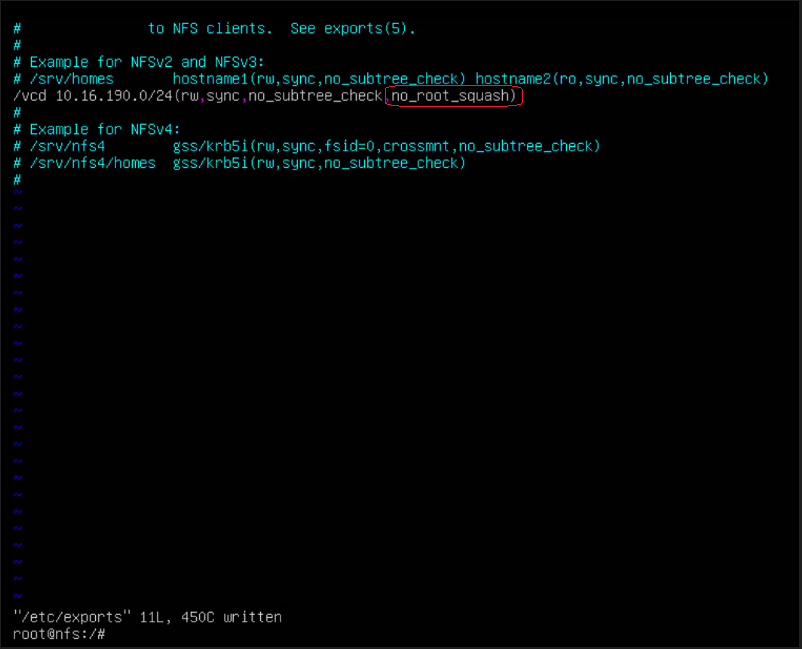
SSH to your NFS server and examine the /etc/exports file.

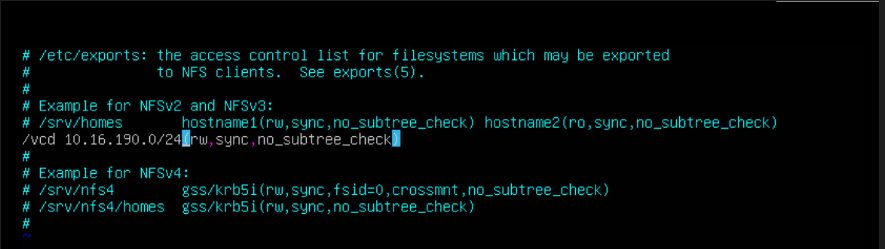
Add the no_root_squash to the line and save the file. [10.16.190.0/24 subnet has all the VCD cells]
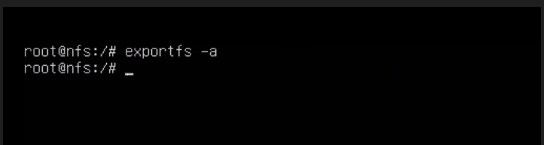
Finally, re-export the NFS mount by running the below command:
Hope this post is informative,
Thanks for reading,
 (1 votes, average: 5.00 out of 5)